Crafts
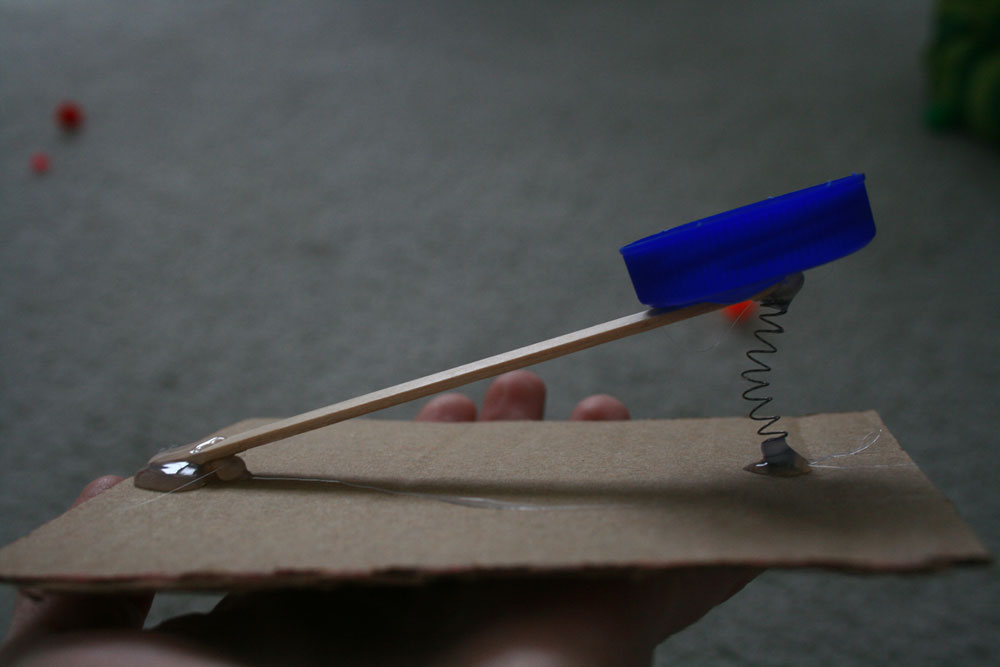
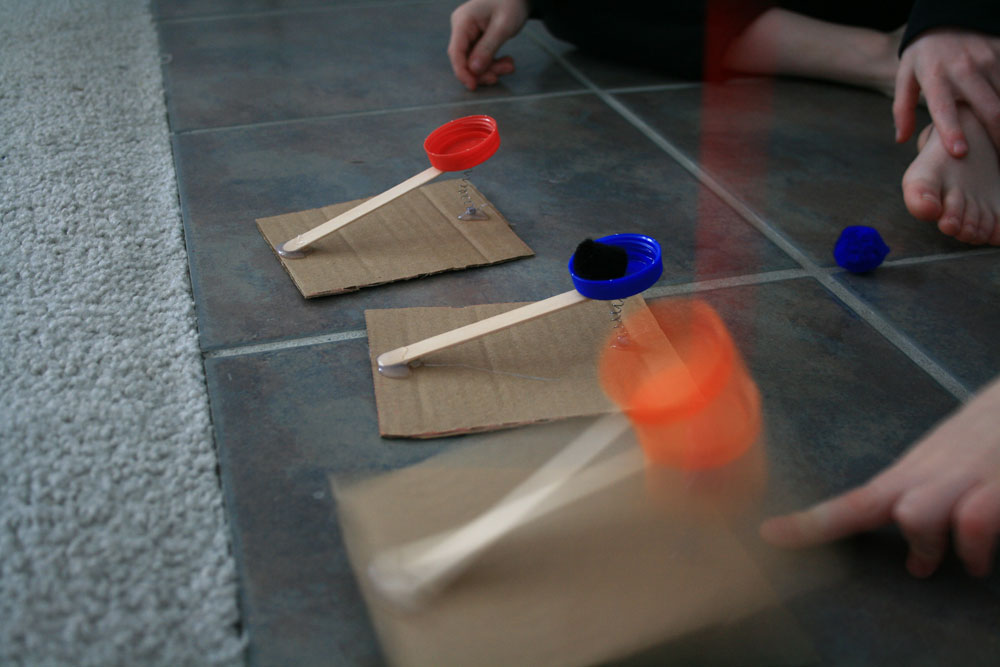
Catapult
The other day I saw instructions for this craft on Journey Into Unschooling.
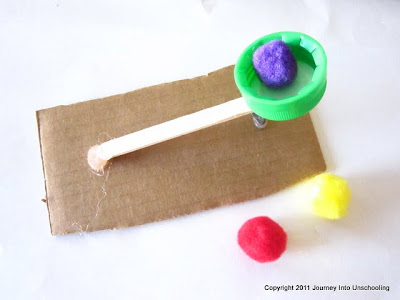
Fun right? The perfect craft for kids stuck home recovering from illness. Well I’m the one who made the craft, my kids are too little to play with hot glue. They sure had fun with their own little catapults though.

Ninja Birthday Party
It has been one crazy week here at my house so I haven’t had a chance to be very crafty. I thought about crafts as I cleaned up after sick kids. I also thought about crafts when I sat in the doctor’s office waiting for him to tell me that my baby does have R.S.V. And I thought about crafts while I washed loads of laundry. I did not actually do any crafts though, so no blog post this week, right? Wrong! I’m going to tell you about the ninja birthday party I hosted for my 7 year old’s birthday.
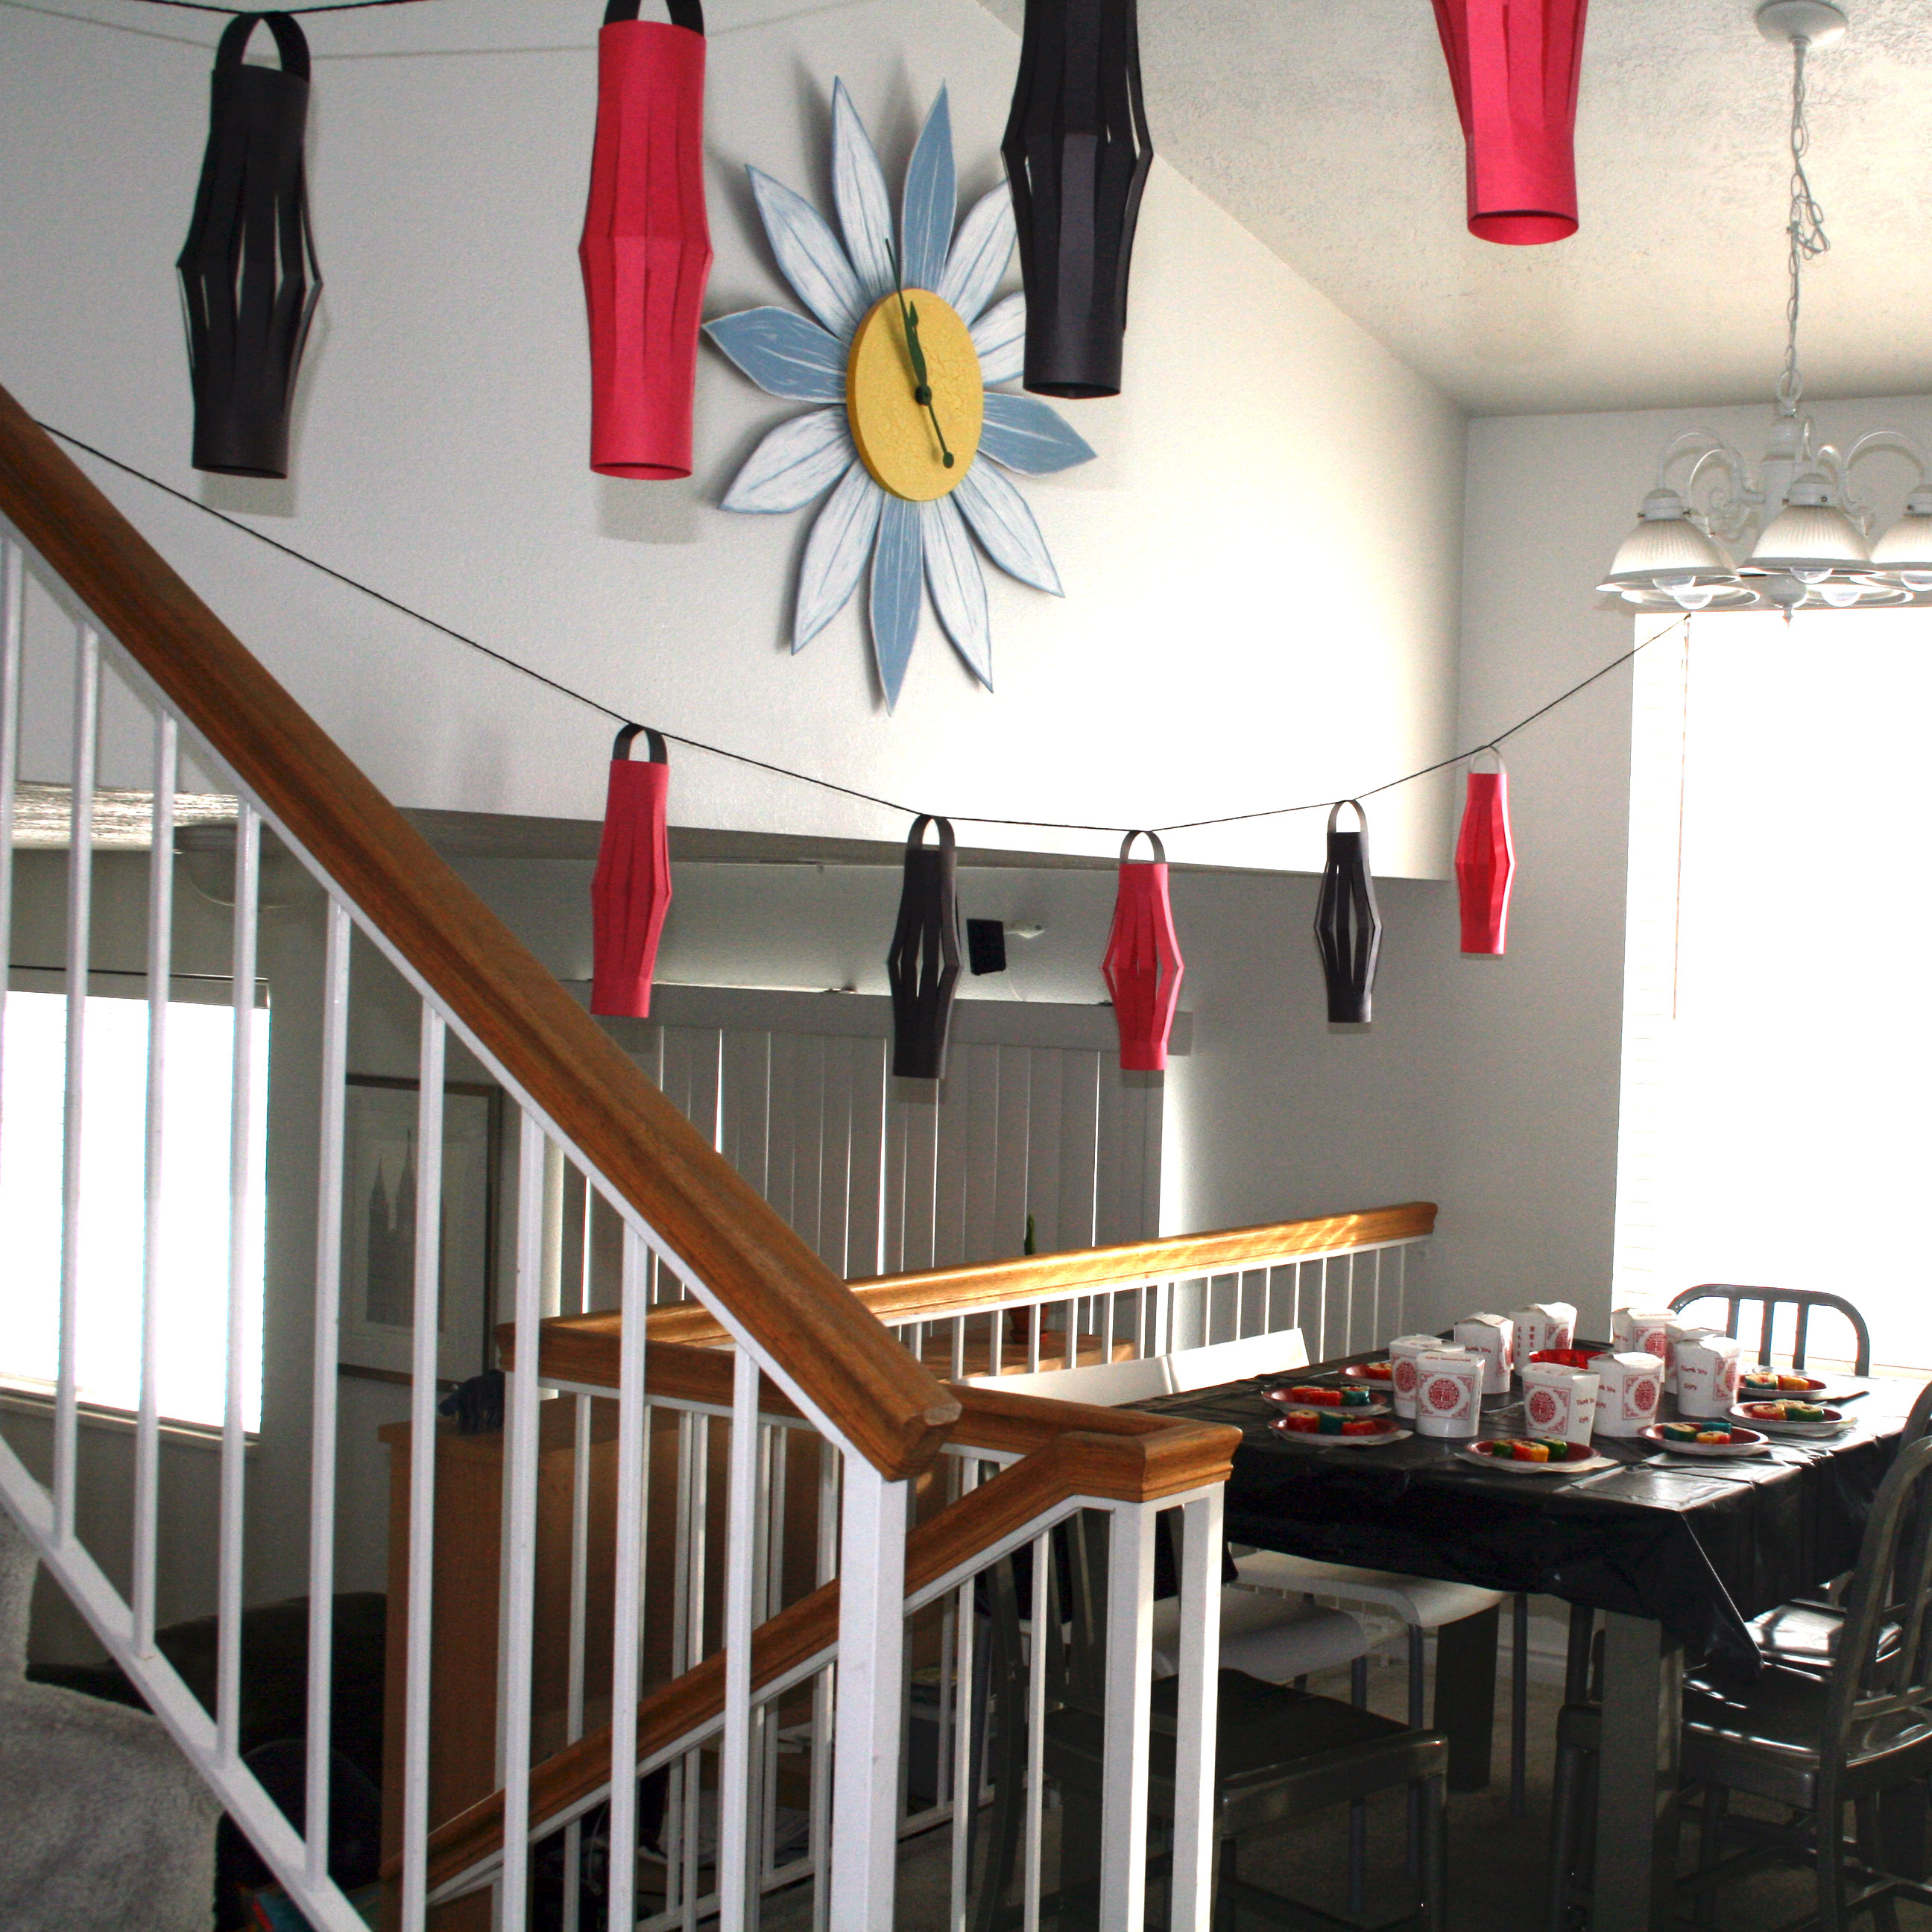
First, a disclaimer: I have never attended a kids birthday party, not even as a kid. Thus, I was really nervous about what to do. The Boy wanted a ninja party so I started searching the web for and thinking of ideas. I started with Chinese lanterns just like I remember making in elementary school. My kids were able to help, which makes them extra fun. Then we hung them from banisters and things.
The guests were sent invitations to a ninja training. We rolled up the invitations like a scroll and tied them with red ribbon. When each child arrived at the party they were given a ninja head band so they felt more like ninjas.
I assumed that there are games at a typical party so I set out to think of some for the party . I remembered that my brother used to make paper ninja stars when we were kids so I found instructions online and made each child their own color of stars. We played a game where we improved our aim by throwing them at pictures of dragon faces on the wall.
I found an idea online for a game where you try to keep a balloon afloat using ninja swords, so my quest for cheap ninja swords began. I searched dollar stores and party stores but alas no swords. I also didn’t want to spend $1 per kid for them because I was doing other stuff too. Then my brain came up with a great idea (this doesn’t happen all that often). 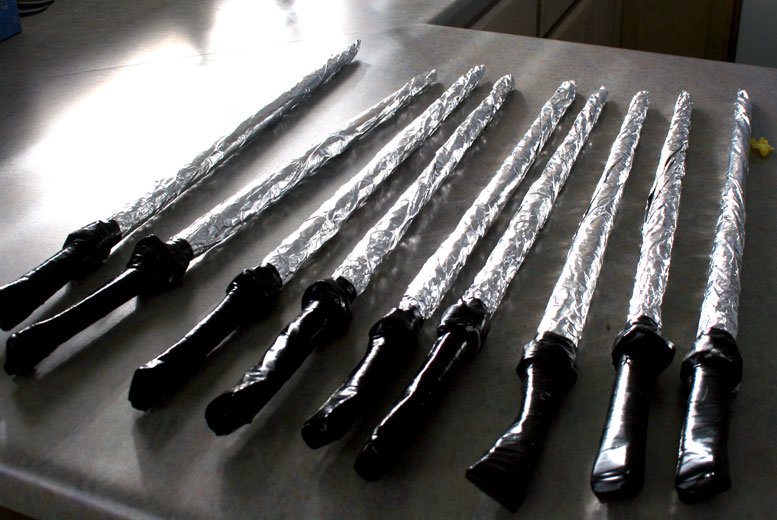 I made these ninja swords by rolling up sheets of newspaper from corner to corner. Then I taped it so it wouldn’t unroll. I folded up the bottom to make the handle a bit more substantial then wrapped it in electrical tape. Finally I wrapped the sword in tin foil. I love the results. The kids did too. They weren’t awesome at the game. They just wanted to pop balloons with their swords, but that kept them busy.
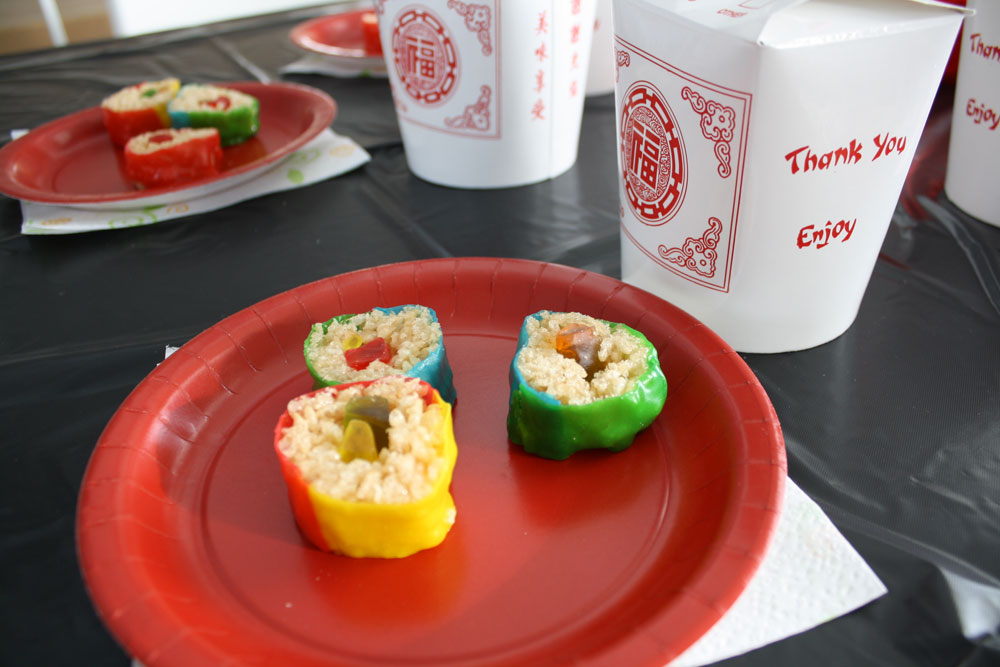
Instead of cake we had candy sushi. It turned out so cute and super tasty. I keep trying to think of other things to do with rice krispy treats covered in fruit roll up. 
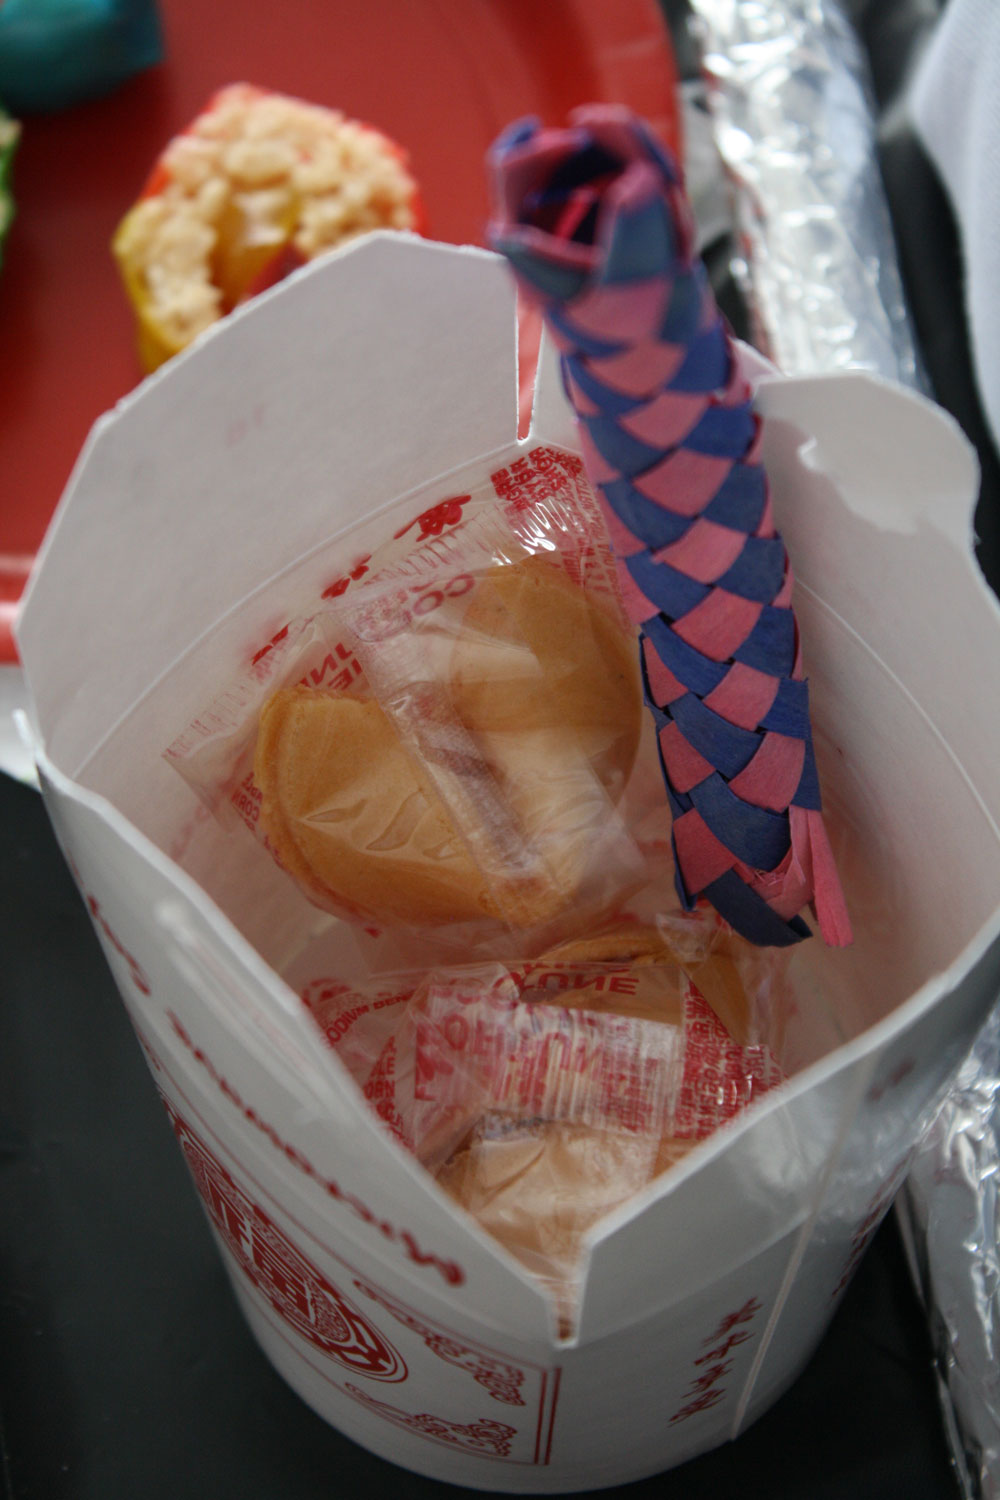
 For party favors I wanted take out boxes from a restaurant. I looked at party stores but they were so expensive. Then my sweet husband brought home the perfect boxes that he asked for at a restaurant where he had lunch. They gave them to him for free, but he said he left a big tip.
We filled the boxes with fortune cookies, Chinese finger traps, and plastic ninjas that I got at the dollar store.
 My first birthday party was a success. The kids had fun, my little ninja was happy, and the mom was the hero of the day!
Paper Mache Hearts

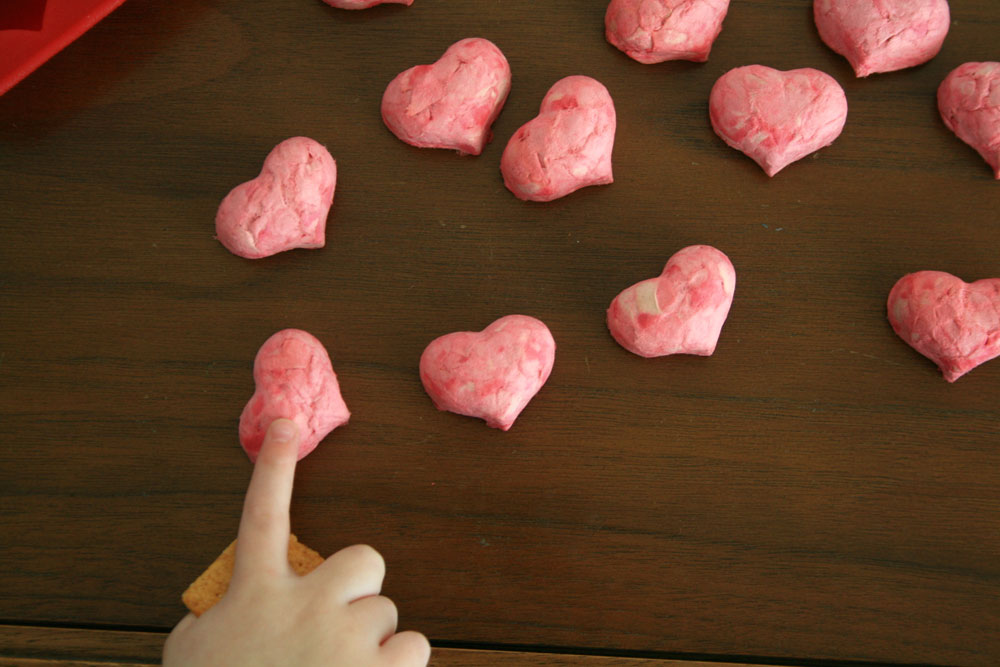
I think my favorite blog in the world is Dollar Store Crafts. Heather is a miracle worker, and I’m a big fan of the way she turns the cheap into the beautiful. Back in October she made paper mache skulls that were so cool, I just had to try it with hearts. I thought it might be cute to use construction paper instead of news paper because then they’d be scrappy and pink. This worked out great, except that I had to leave the paper to soak for a lot longer than an hour. After about 6 hours I was able to break the paper apart with my hands, but the mixer did nothing but spit the paper around. (See the skull tutorial to see what I’m talking about.) I love the way they turned out. The only problem now is that I don’t know what to do with them. Any ideas?
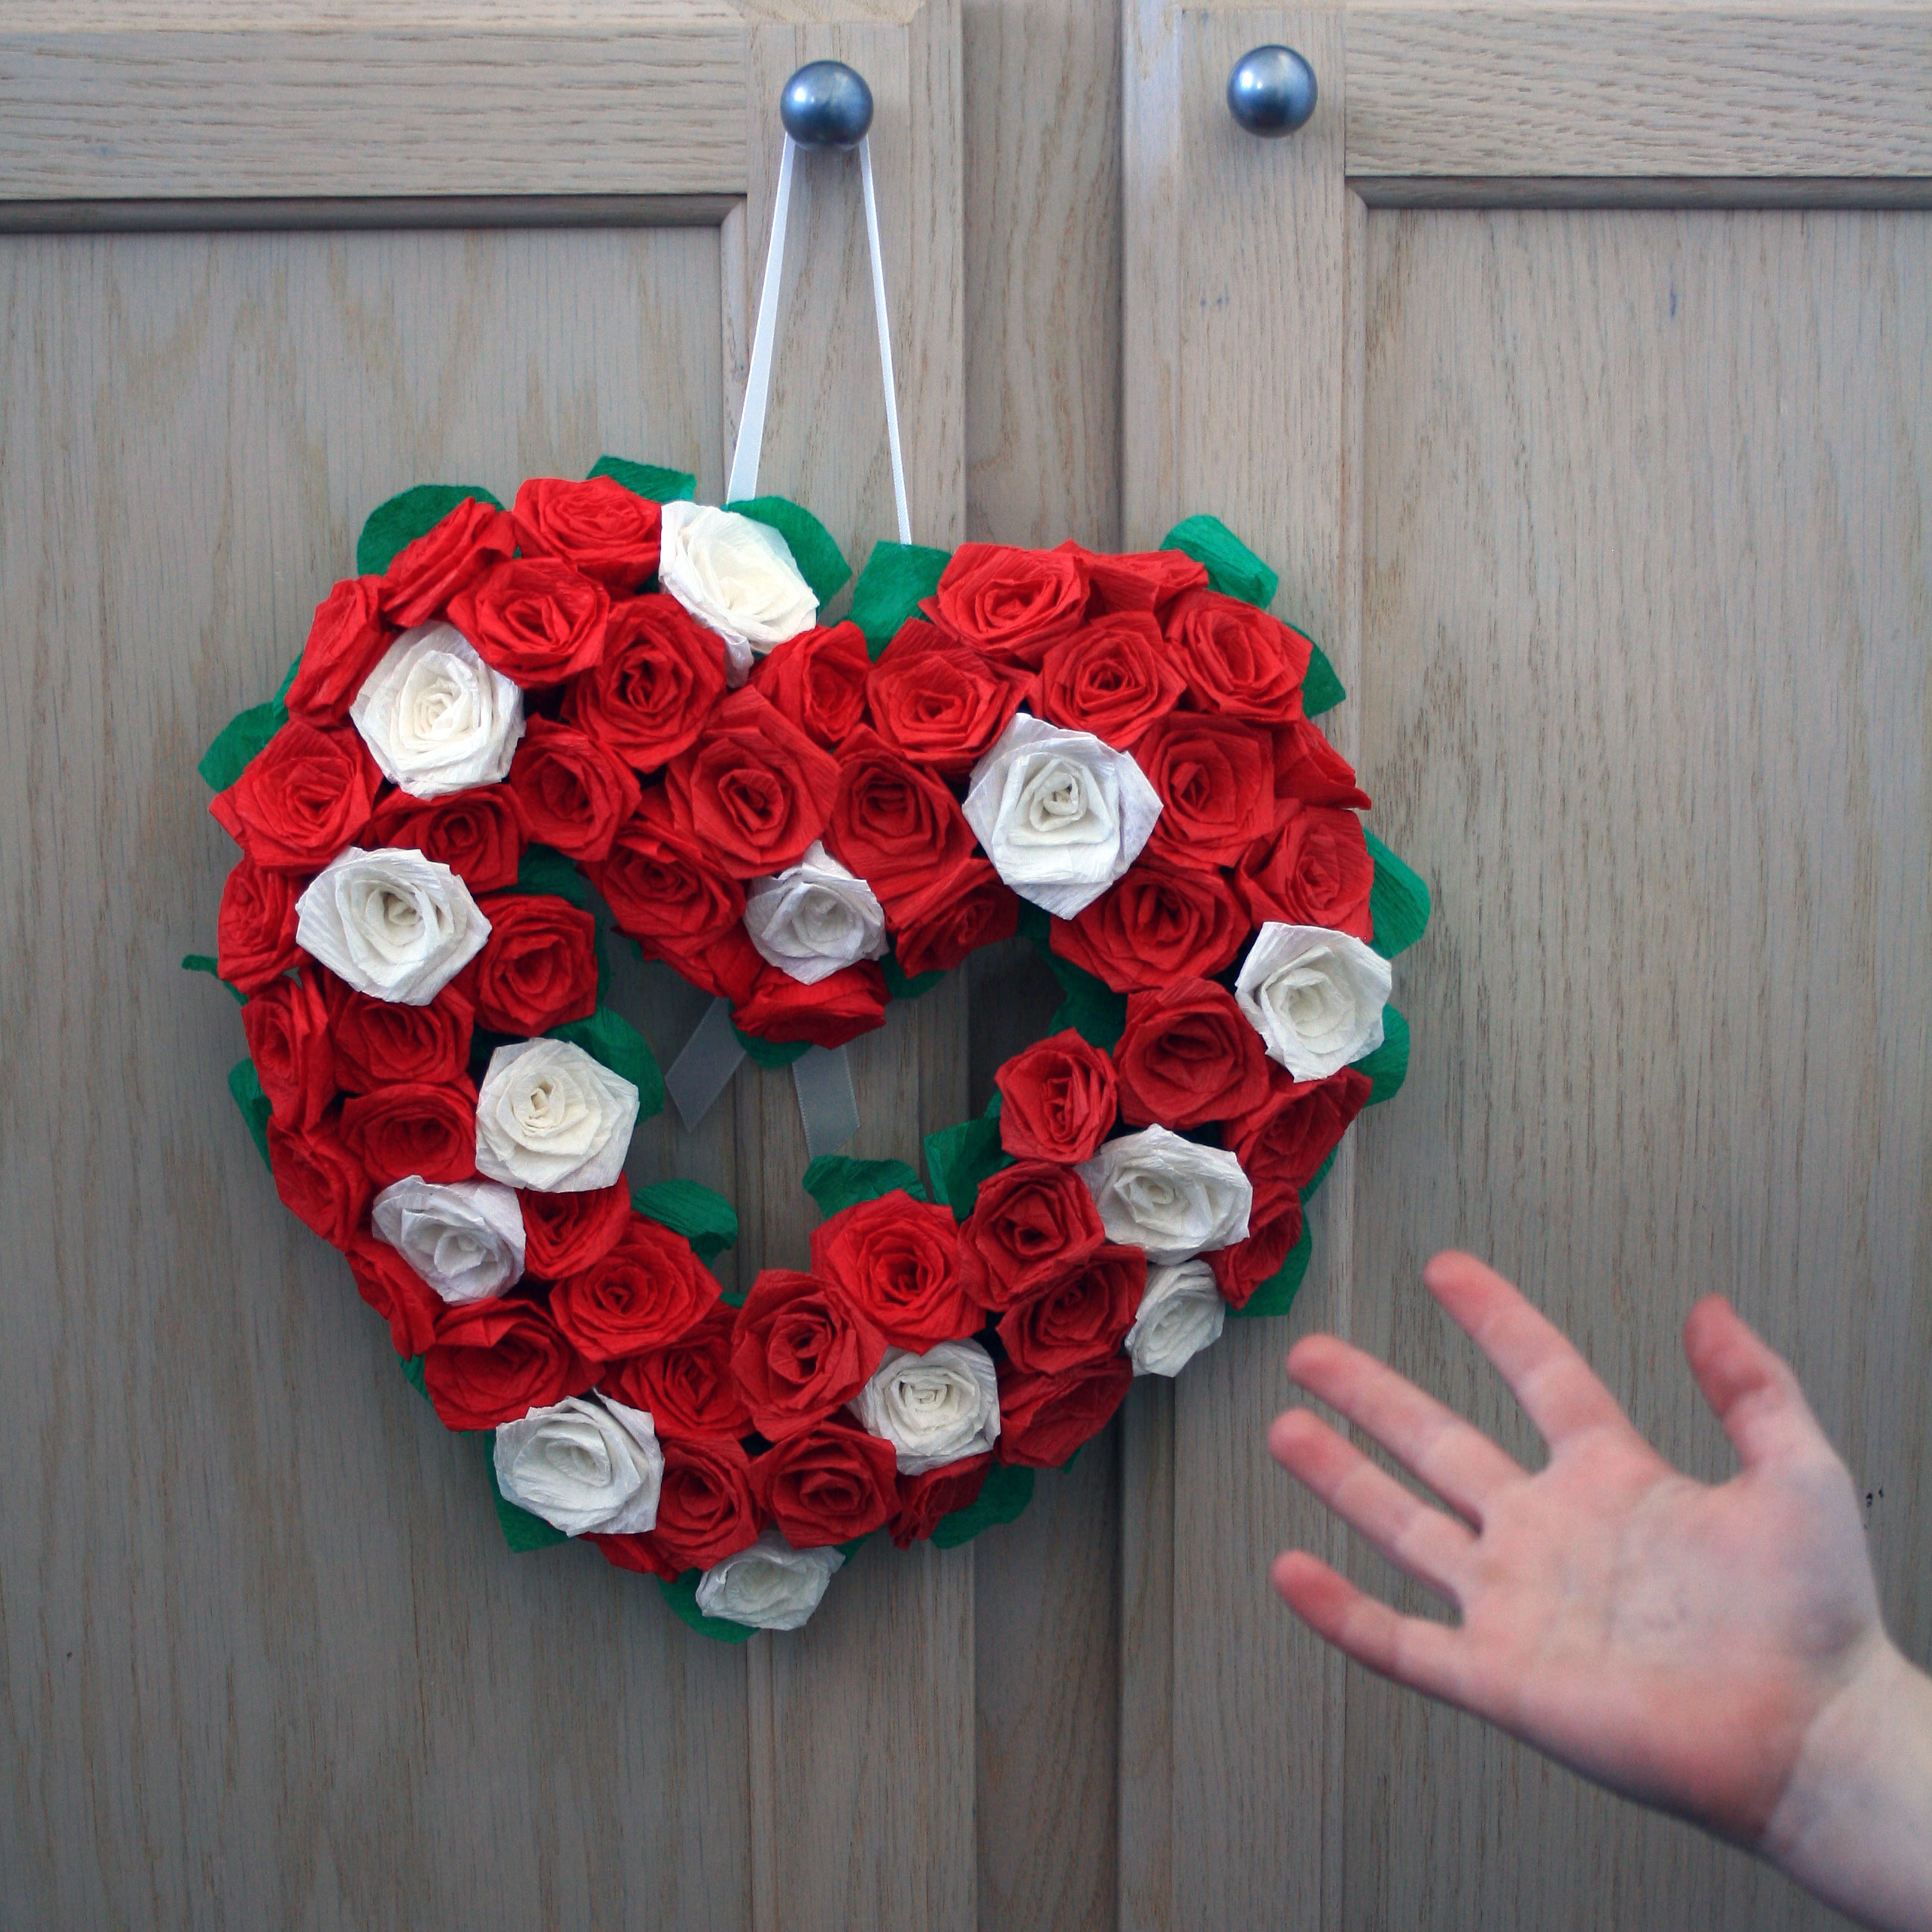
Crepe Paper Rose Heart

I love the roses I learned to make on Filth Wizardry. I make them all the time. Not because I have any reason, just because they make me happy. I would show you how I make the roses, but that would be silly when there’s such a great tutorial video on Filth Wizardry! My newest creation from crepe paper roses is this wreath.
I got the idea for a crepe paper rose wreath from At Second Street. Her roses are beautiful, but I wanted to try a similar concept with different roses.
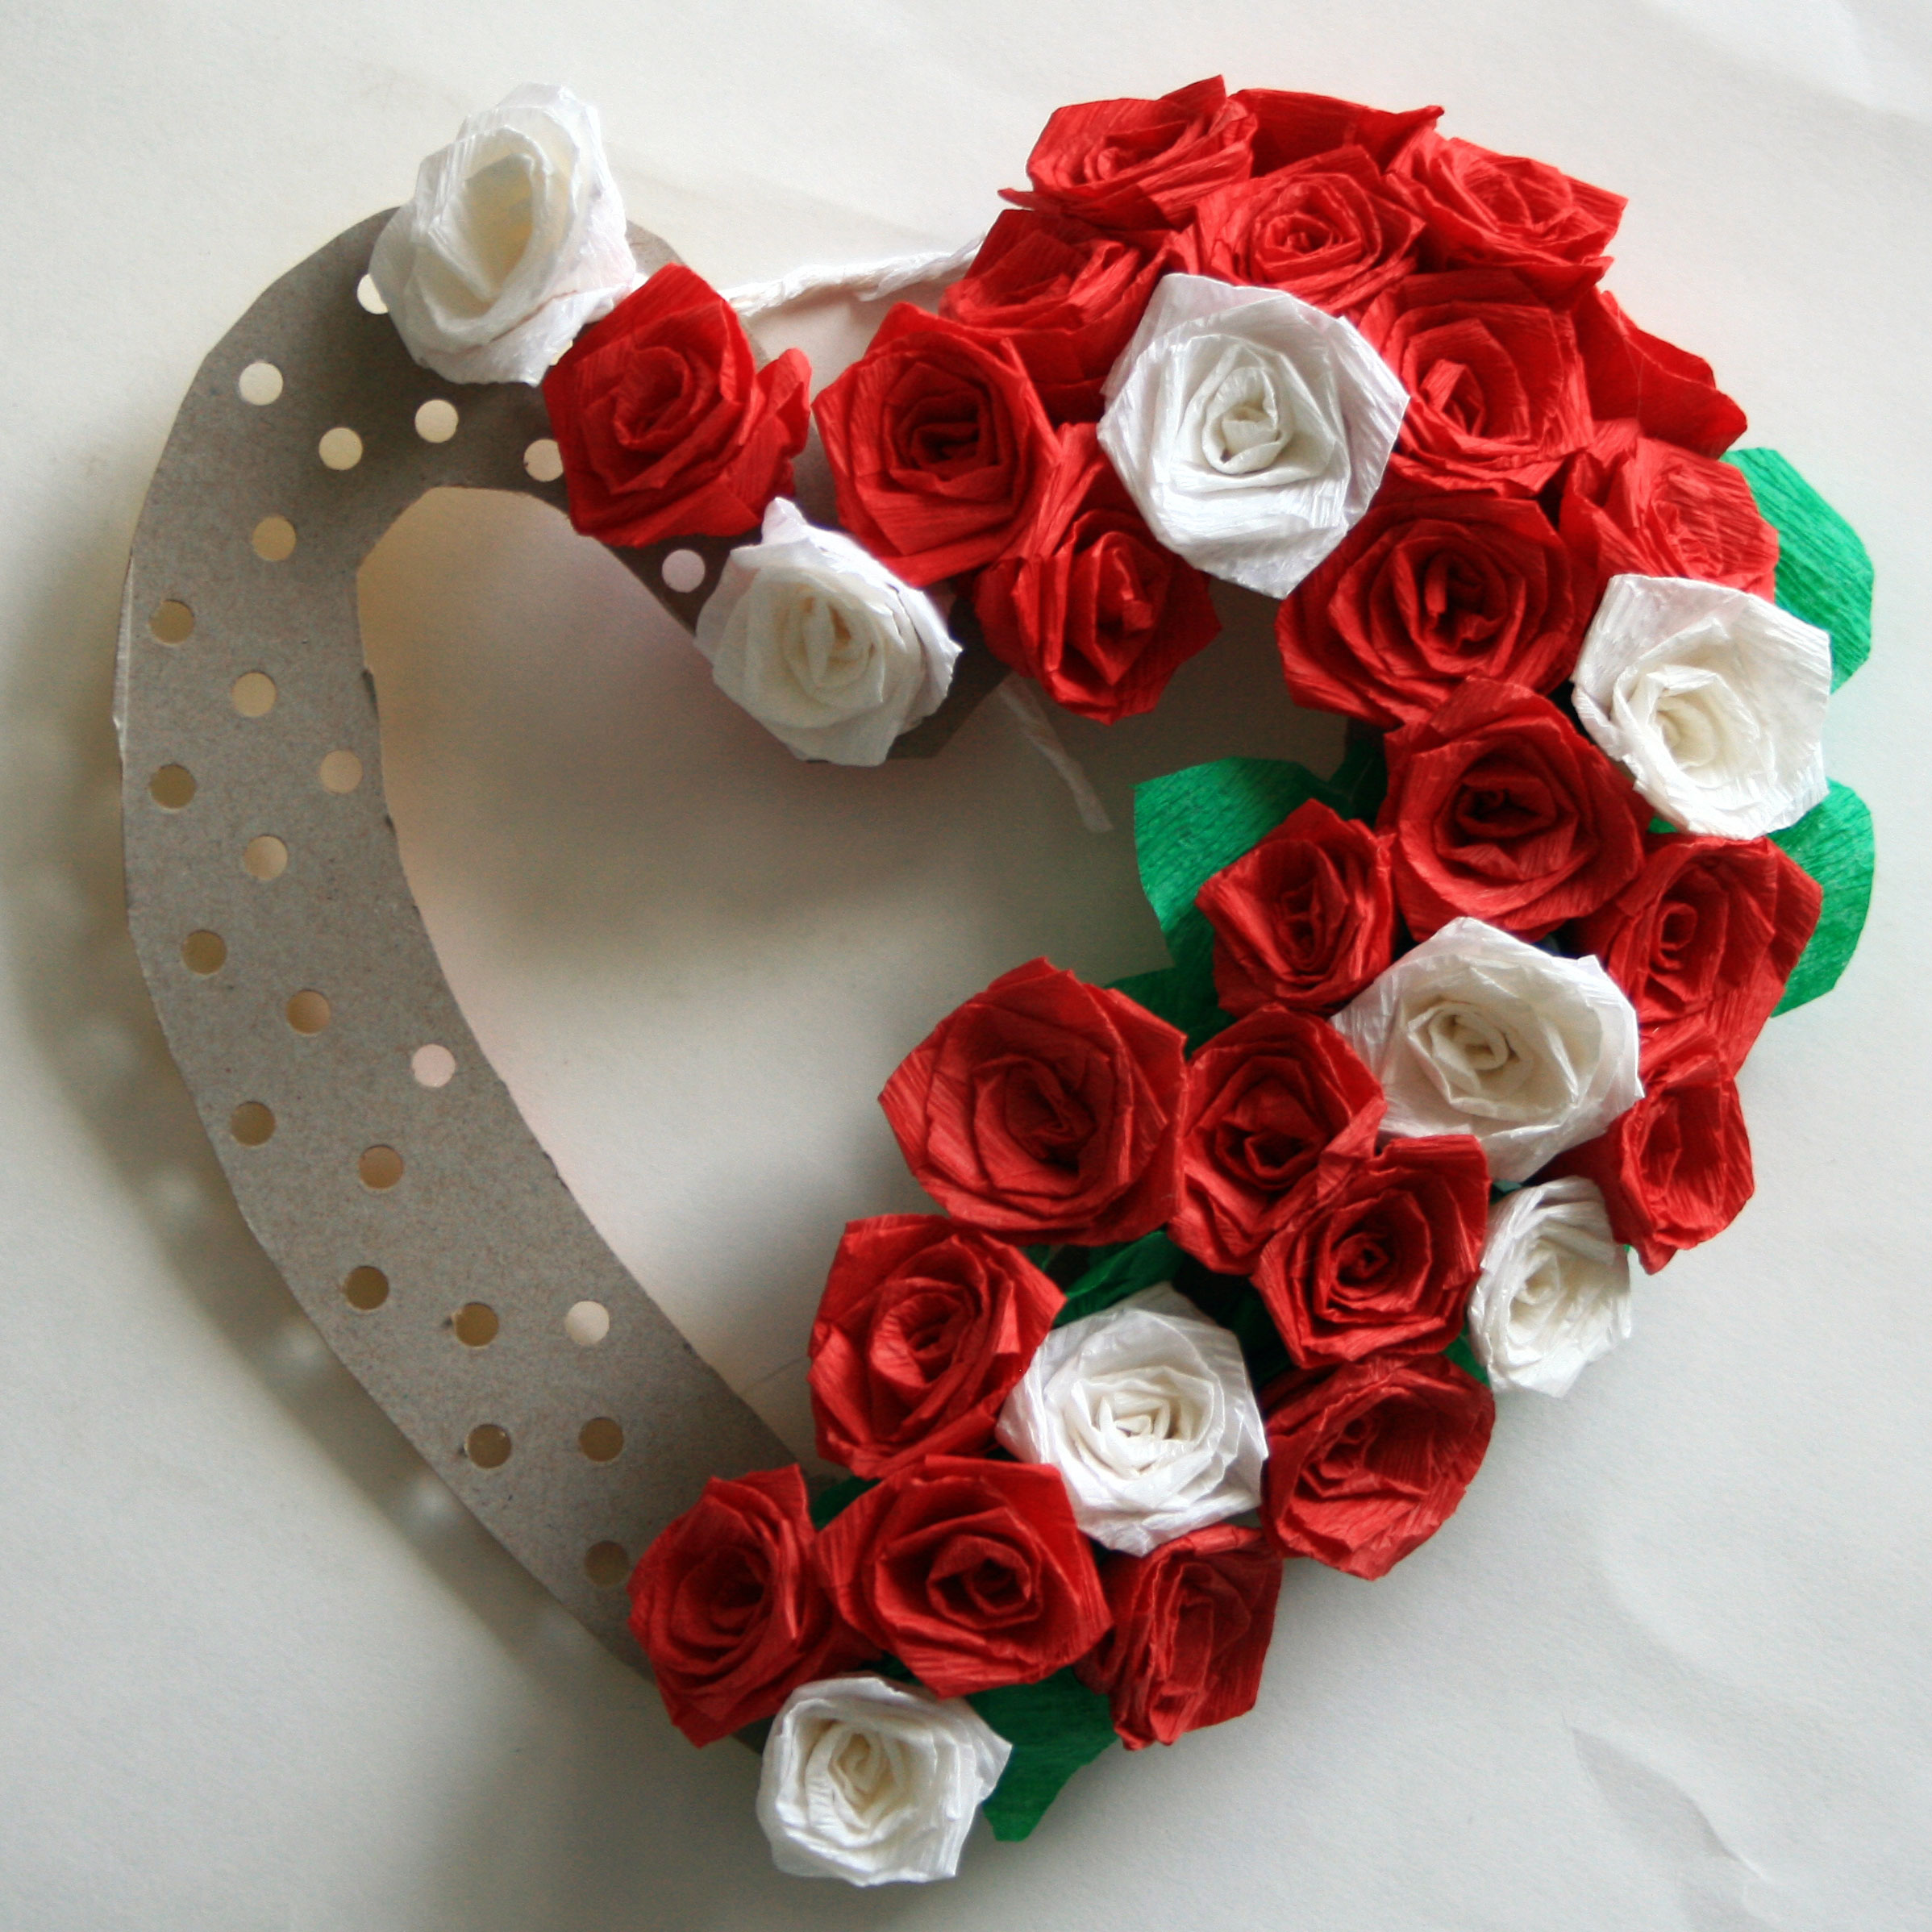
First, I cut out a heart shape from a piece of cardboard, specifically a ritz cracker box. When I make a rose, I have to have a stem so I used a hole punch and made holes for each rose. Then I threaded the rose stems through the holes.
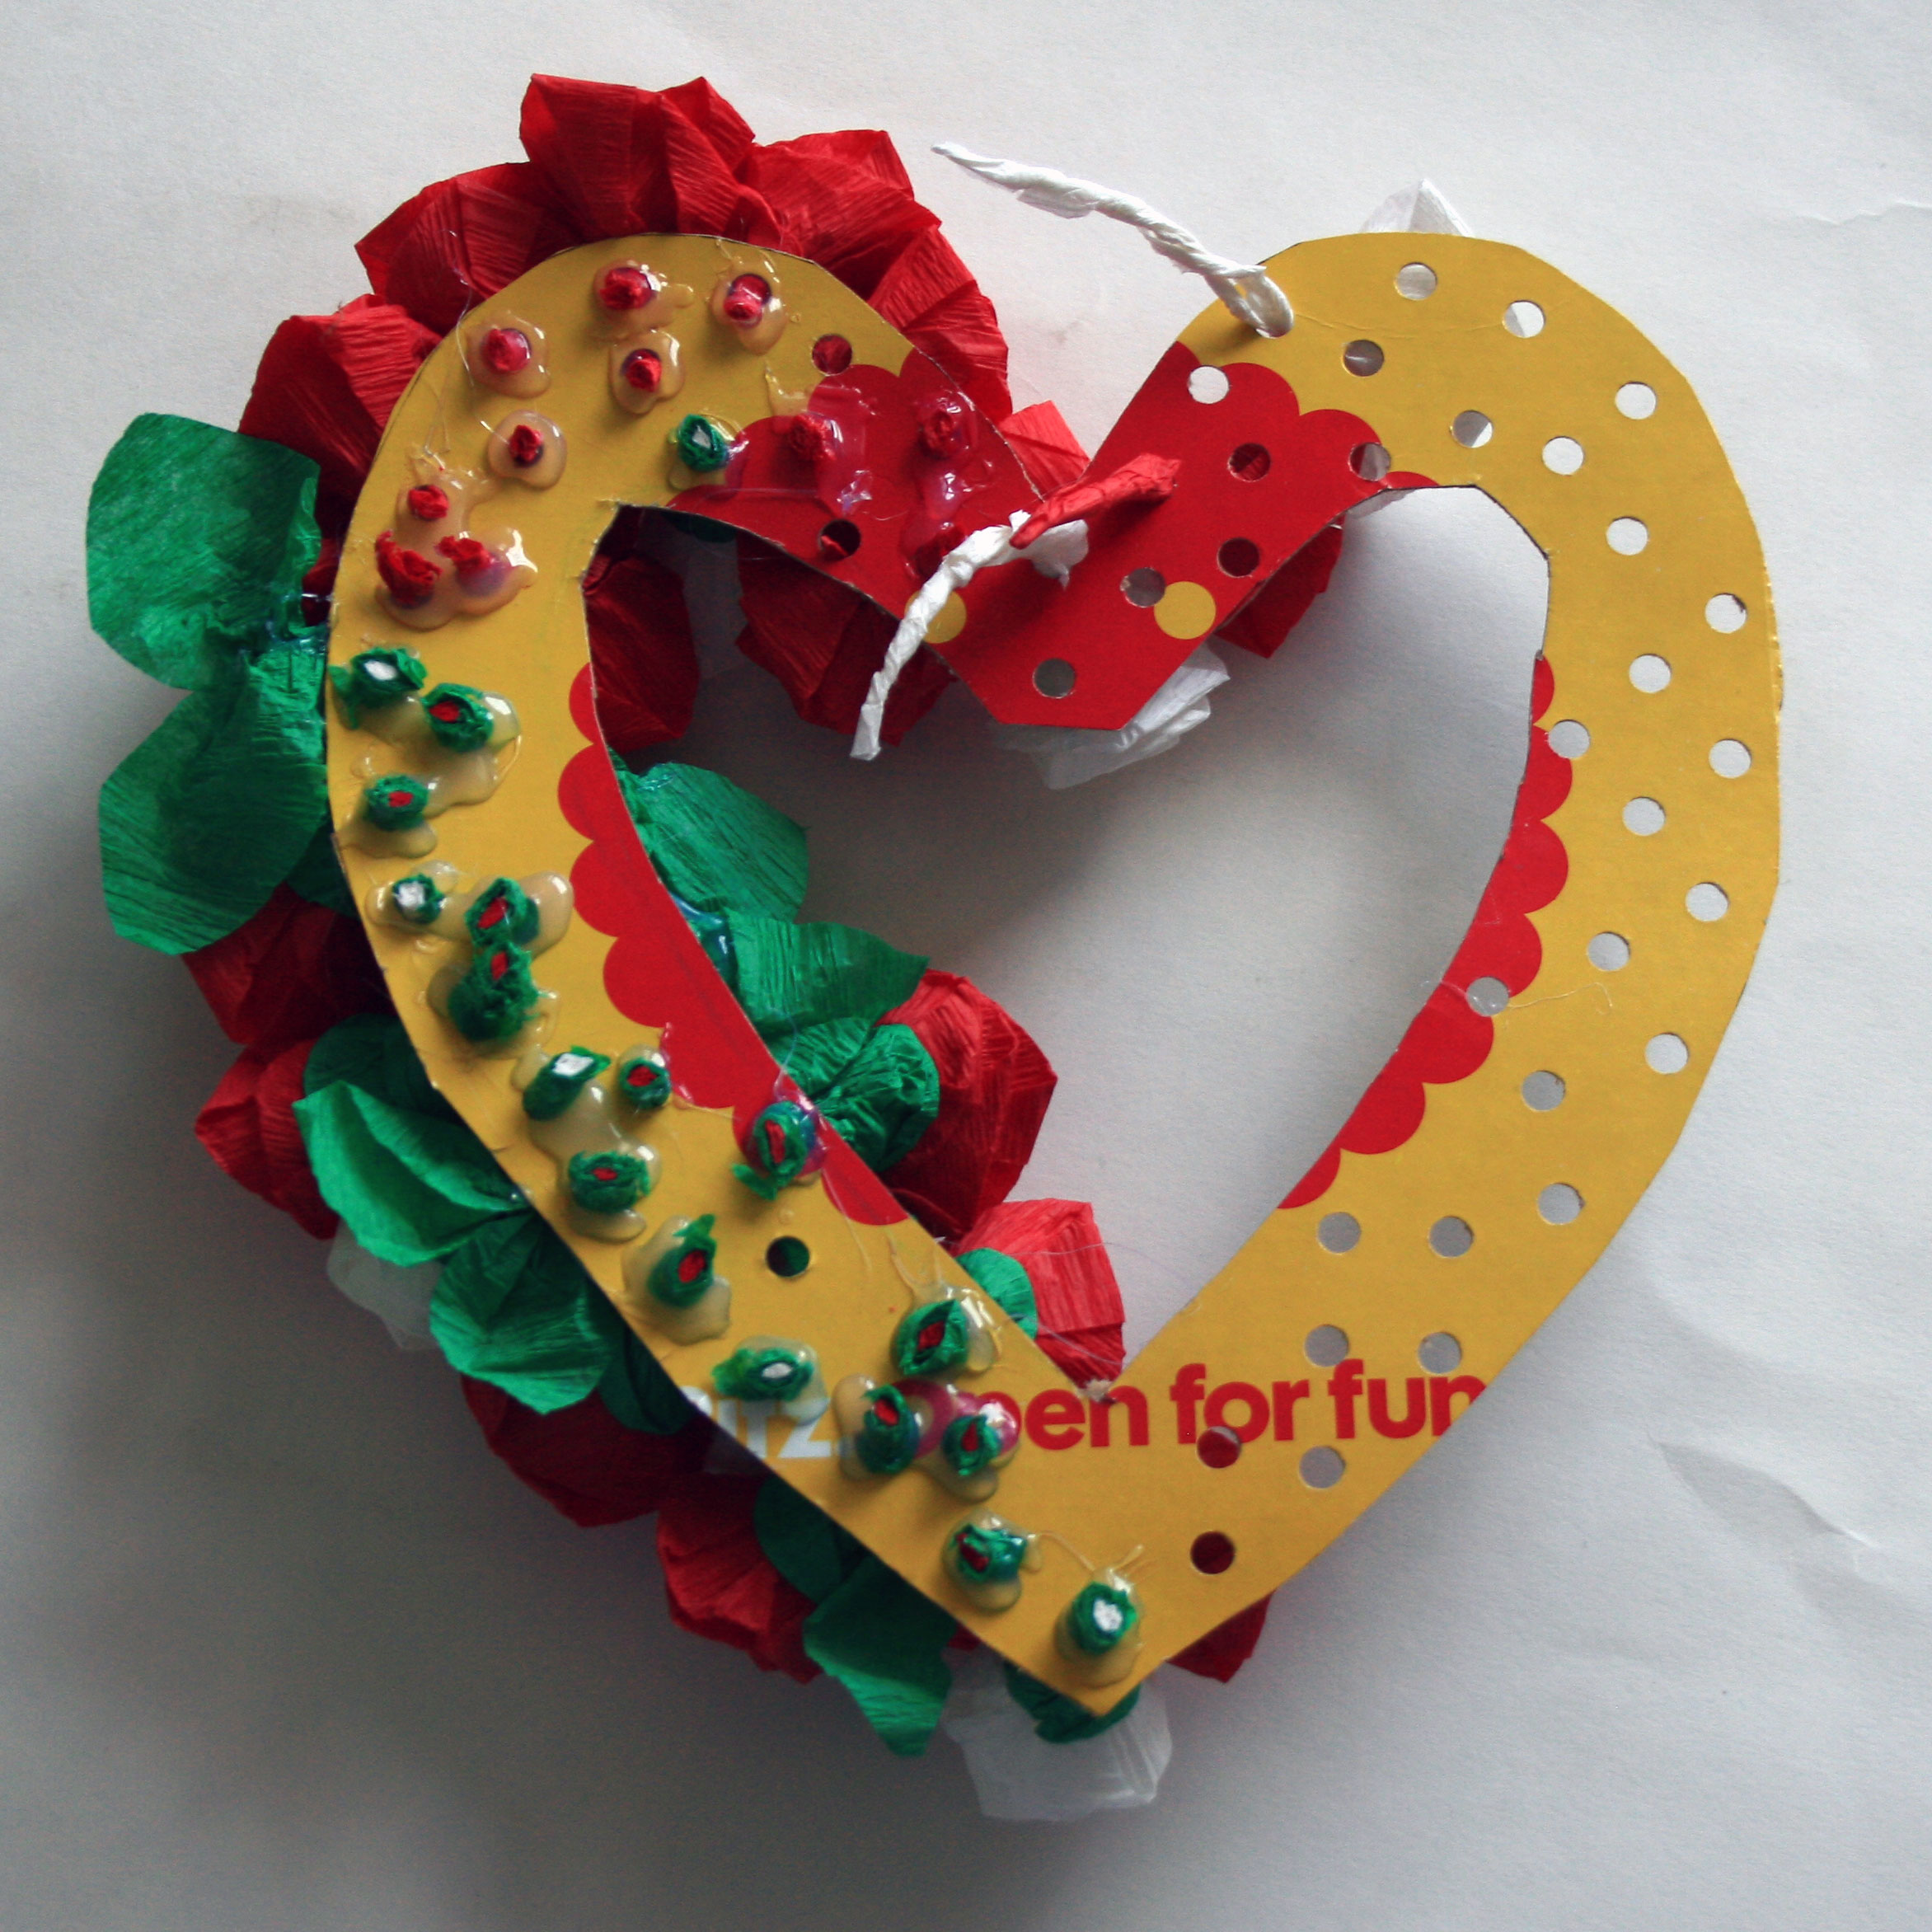
Next I hot glued the stems on the back side and clipped off the extra stem parts. When all of the roses were glued in place I made green leaves and glued them around the outside of the heart.
To make the leaves I just folded a piece of crepe paper in half and cut the top like a leaf and twisted the bottom. I was going to glue another piece of cardboard to the back, but I’m not that tidy.
Glue a piece of ribbon to the back of your wreath, and you’re done. Beautiful results for not so much work. It does take a while to make all of the roses (I think there are about 60) but you can do that while you’re watching some romantic valentines movie….or watching some action adventure because you’d rather be sitting next to your valentine.