Crochet
Crochet Bracelet
Welcome back to my blog. I’m sorry It’s been so long. Crafting took a wee vacation from my house. That’s not entirely true but many of my attempts at fun crafts turned out….well….unblog-worthy. After sewing through my finger I decided that maybe I needed to take a break. I’m back though and soon my sister will be contributing to the blog too. She’s awesome so you can get excited.
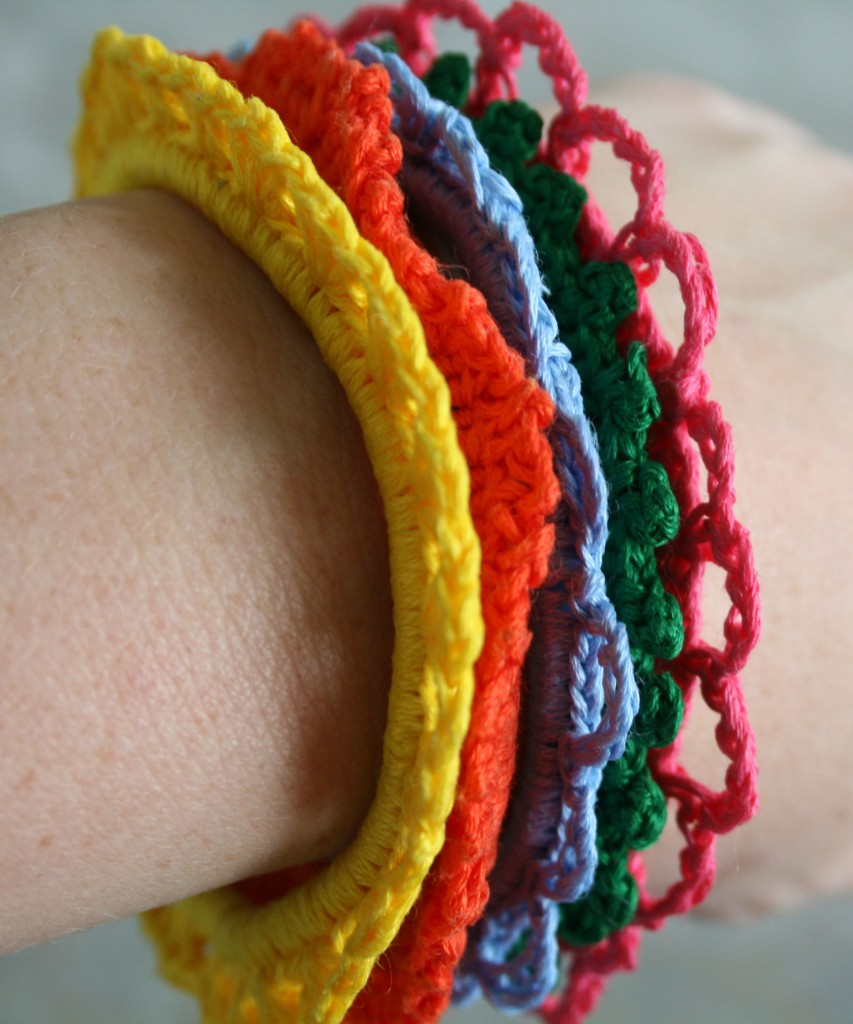
Today’s blog post is something I came up with about 30 min before church. I wanted a cute bracelet to wear with a new outfit but I didn’t have anything that matched. I pulled out some stuff I had and crocheted myself a bracelet. I only had time to make one then, but I have made more since (and I plan to make even more.)
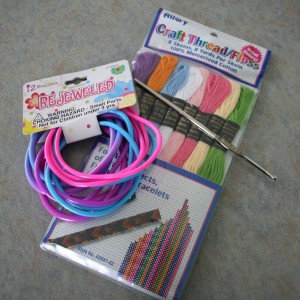
Here’s what you’ll need to make your own pretty crochet bracelets.
Jelly Bracelets
embroidery thread
A crochet hook
White Glue (if you want to starch them)
I got my bracelets and thread at Honks Dollar store on .88 cent Tuesday. This means that each bracelet only costs about .22 cents to make. A cheapskate such as myself get’s pretty excited about that.
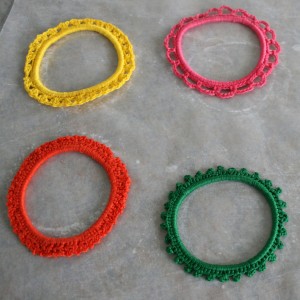
All you need to do now is tie a knot with the thread around the bracelet and then single crochet all the way around. I didn’t really count my stitches. I just crochet until the bracelet is completely covered and I can’t see bits of bracelet peeking through. When you get all the way around join the end with a slip stitch into the beginning single crochet.
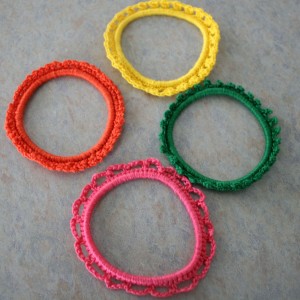
Next I c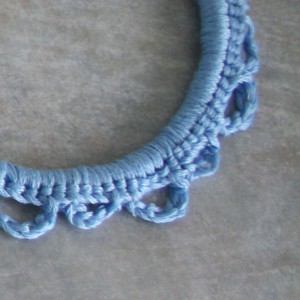 rochet a different border around each bracelet. Some picots, some ruffles, some scallops. I’m still thinking of other borders I can crochet. Most of these only take one little skein of thread, but if you do a stitch that takes more, you might need to use a little of a second skein.
That’s it, just weave in your end and your done. Well, mostly. After a while I found that my borders were curling. It bothered me. I decided to starch my bracelets to make them stand out better.
To starch them I mixed 1 cup of water with 1 tsp of white school glue. I dunked the bracelets then set them out on wax paper, pulling out the little picots and scallops. I don’t know how long they will stay starchy but I do like the results so I will be doing this with all of my bracelets from now on. Do you want to make some bracelets? You should because it’s cheap, easy, and the results are pretty fun.
Before Starching
After Starching
Rag Rug
Well my dear blog reader, already I have failed you. I promised a new post every week and last week I did not post. I have no awesome excuse. I have been riddled with guilt but alas, I just didn’t have anything new to post. Was I not crafting? Well not much. Today I am back however and I apologize for my absence.
A couple of weeks ago my husband cleaned out his T-Shirt drawer. When he does this it’s like Christmas for me. I love love love to cut up t-shirts to make yarn. Something about the thriftiness of it all thrills me. What I end up with is a whole lot of t-shirt yarn and no project. I decided to start with the least pleasing colors and make a rug. Just to get a feel of the yarn and what it will look like when I work it up. 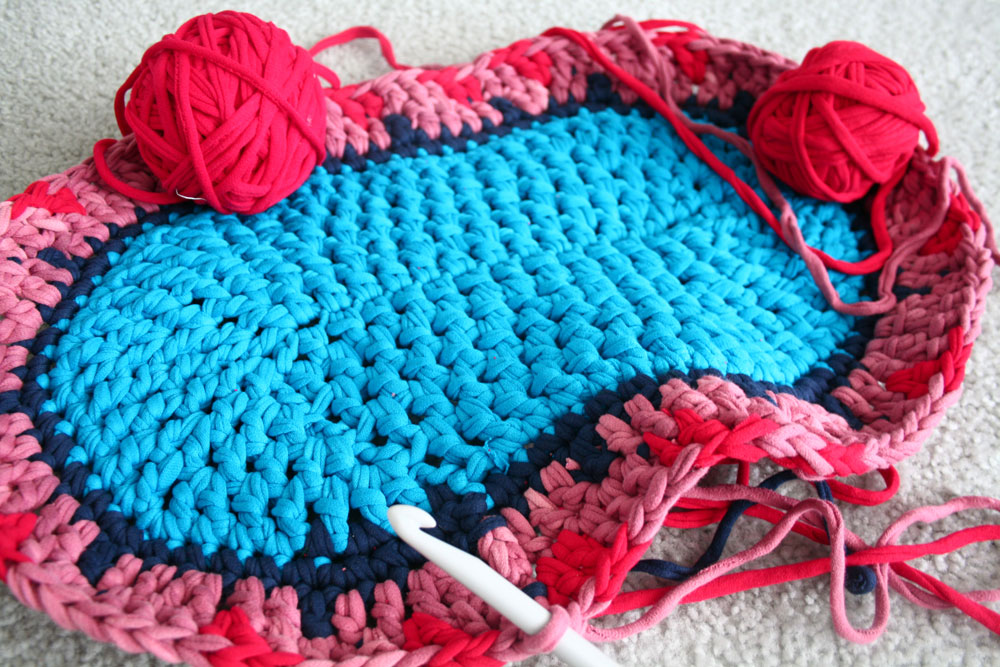
It’s ugly, I know. But it gets me going with other ideas. Want to make your own rag yarn? I was going to make a tutorial but it takes 2 hands to make this stuff and I’m not smart enough to figure out how to take photos at the same time. Why would I repeat what others have done so well anyway? So if you want to make your own t-shirt rag yarn (some people call it tarn…those people are crazy) look at this tutorial by Craft Passion. See how she made a basket at the end? That’s what I’m going to do next with my pretty colors of tarn.
Here are a few more photos to inspire you.
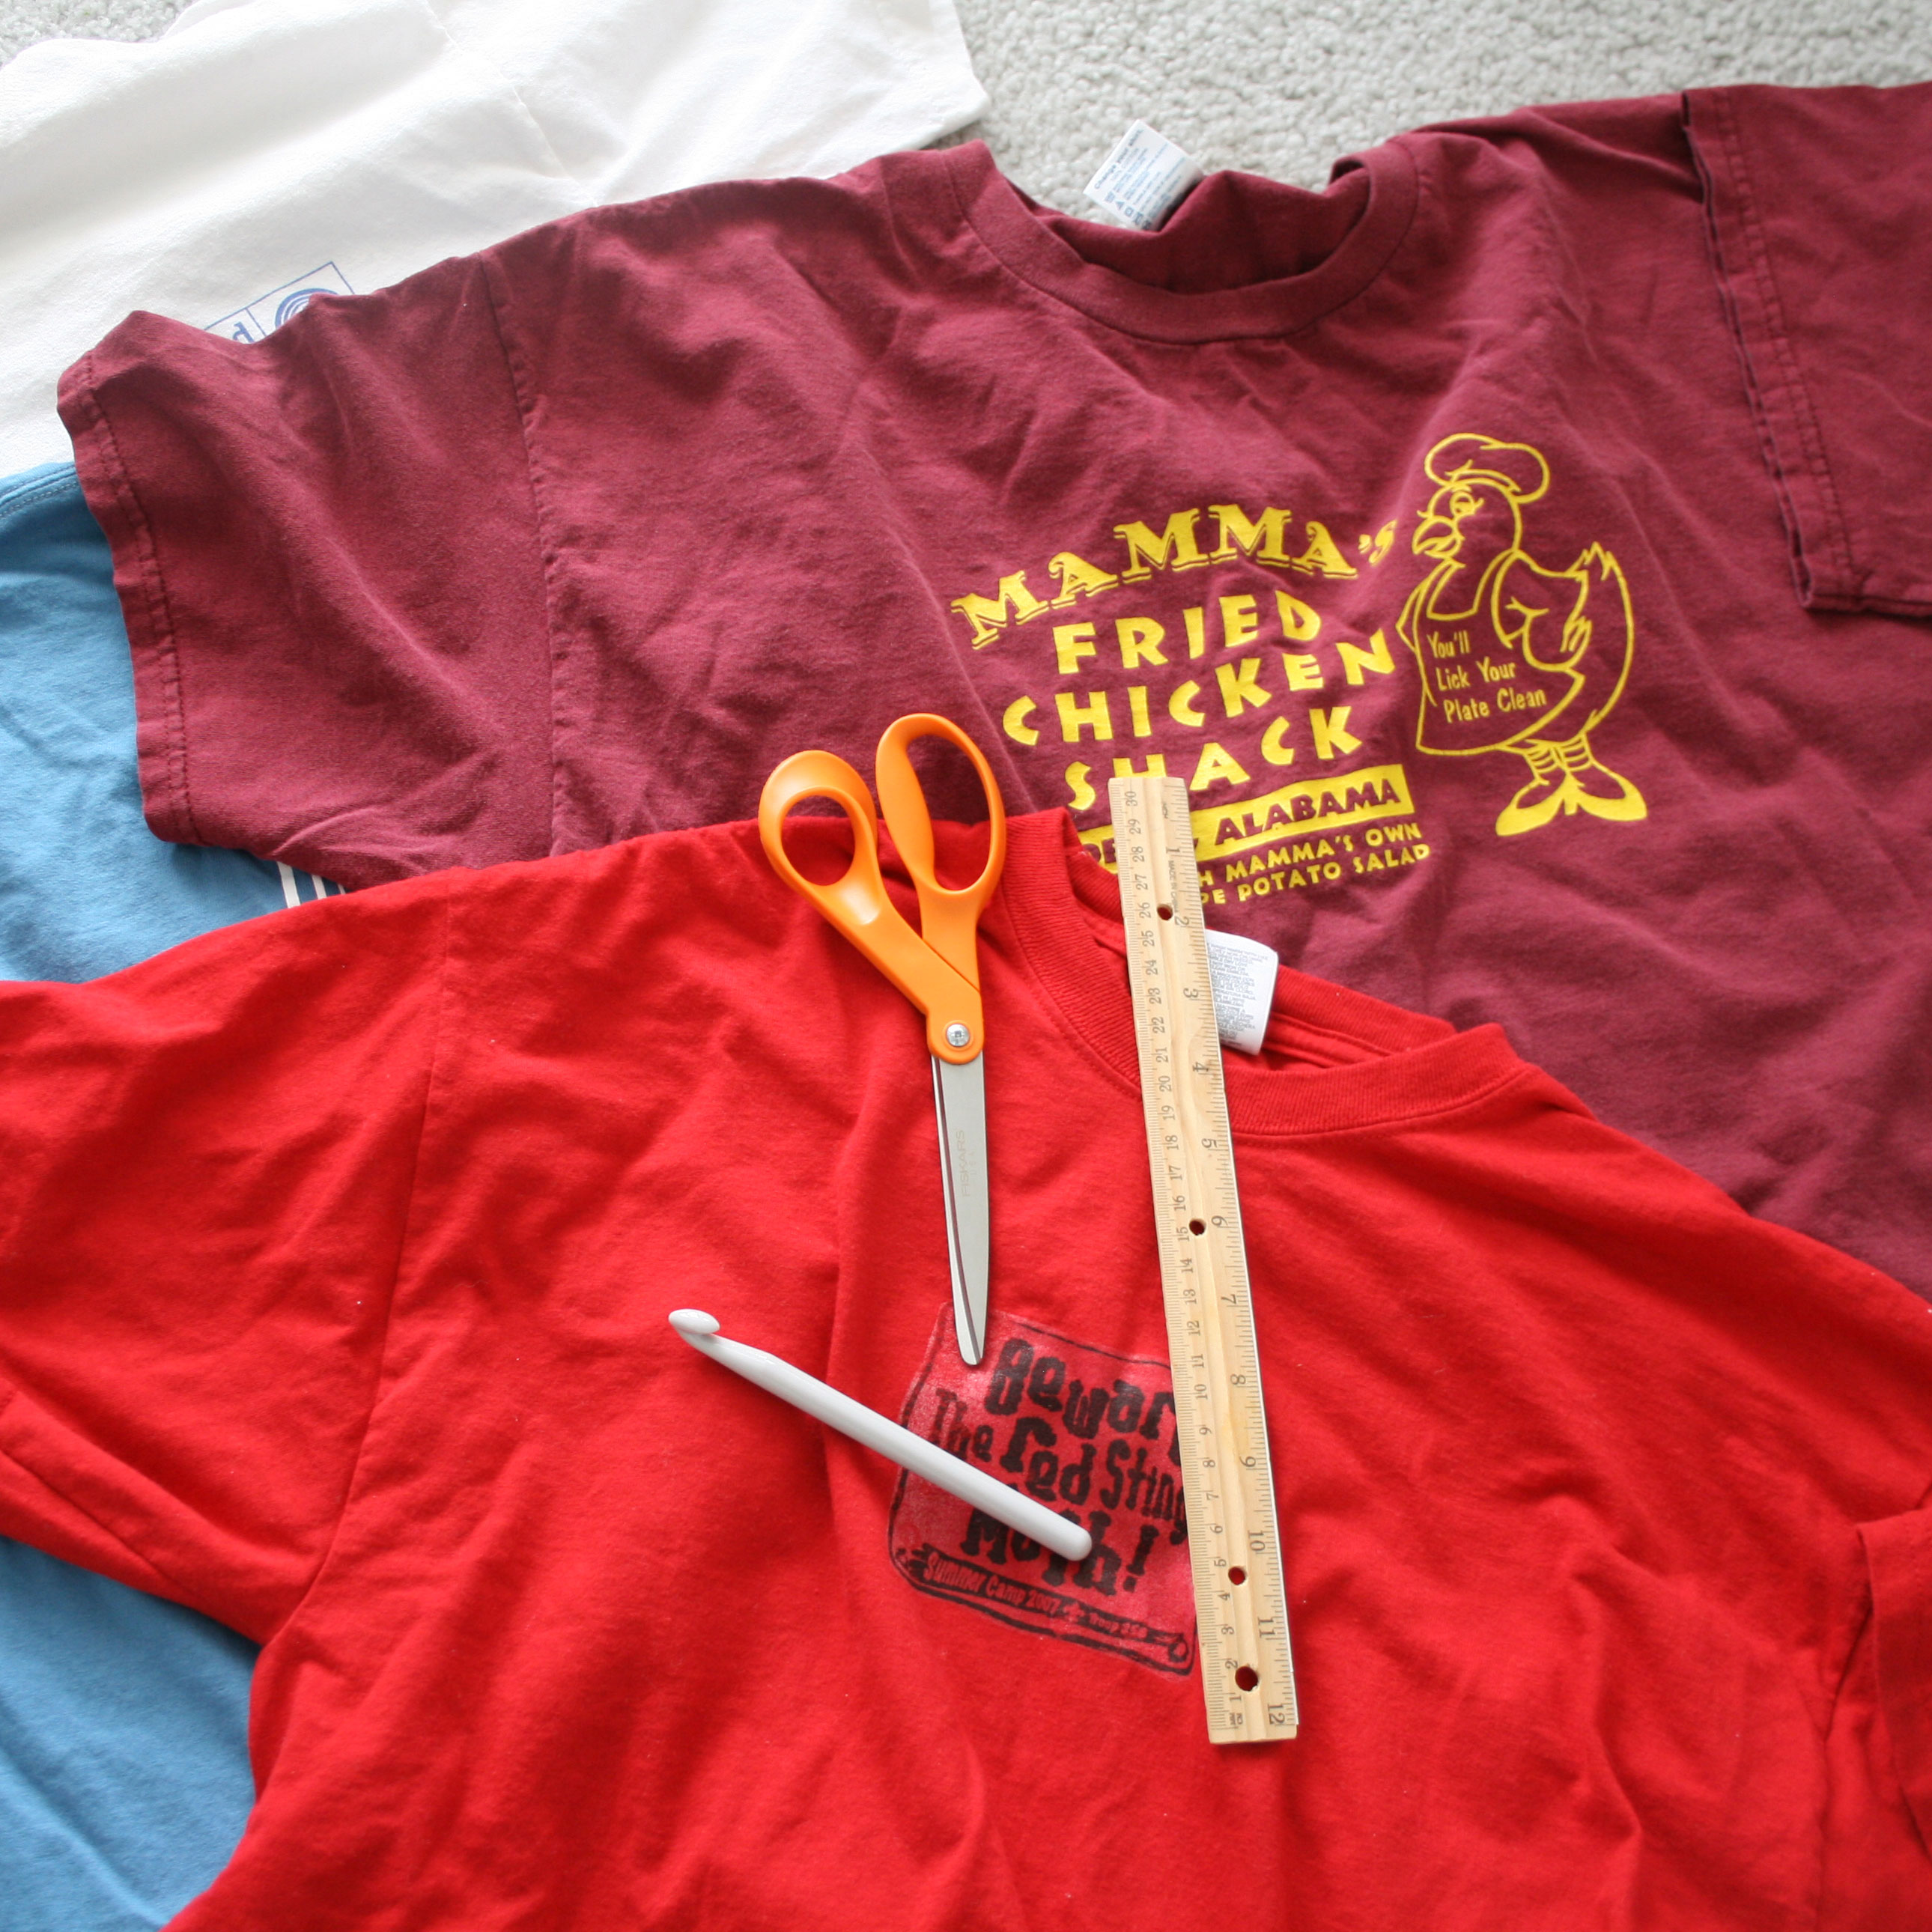
What you need
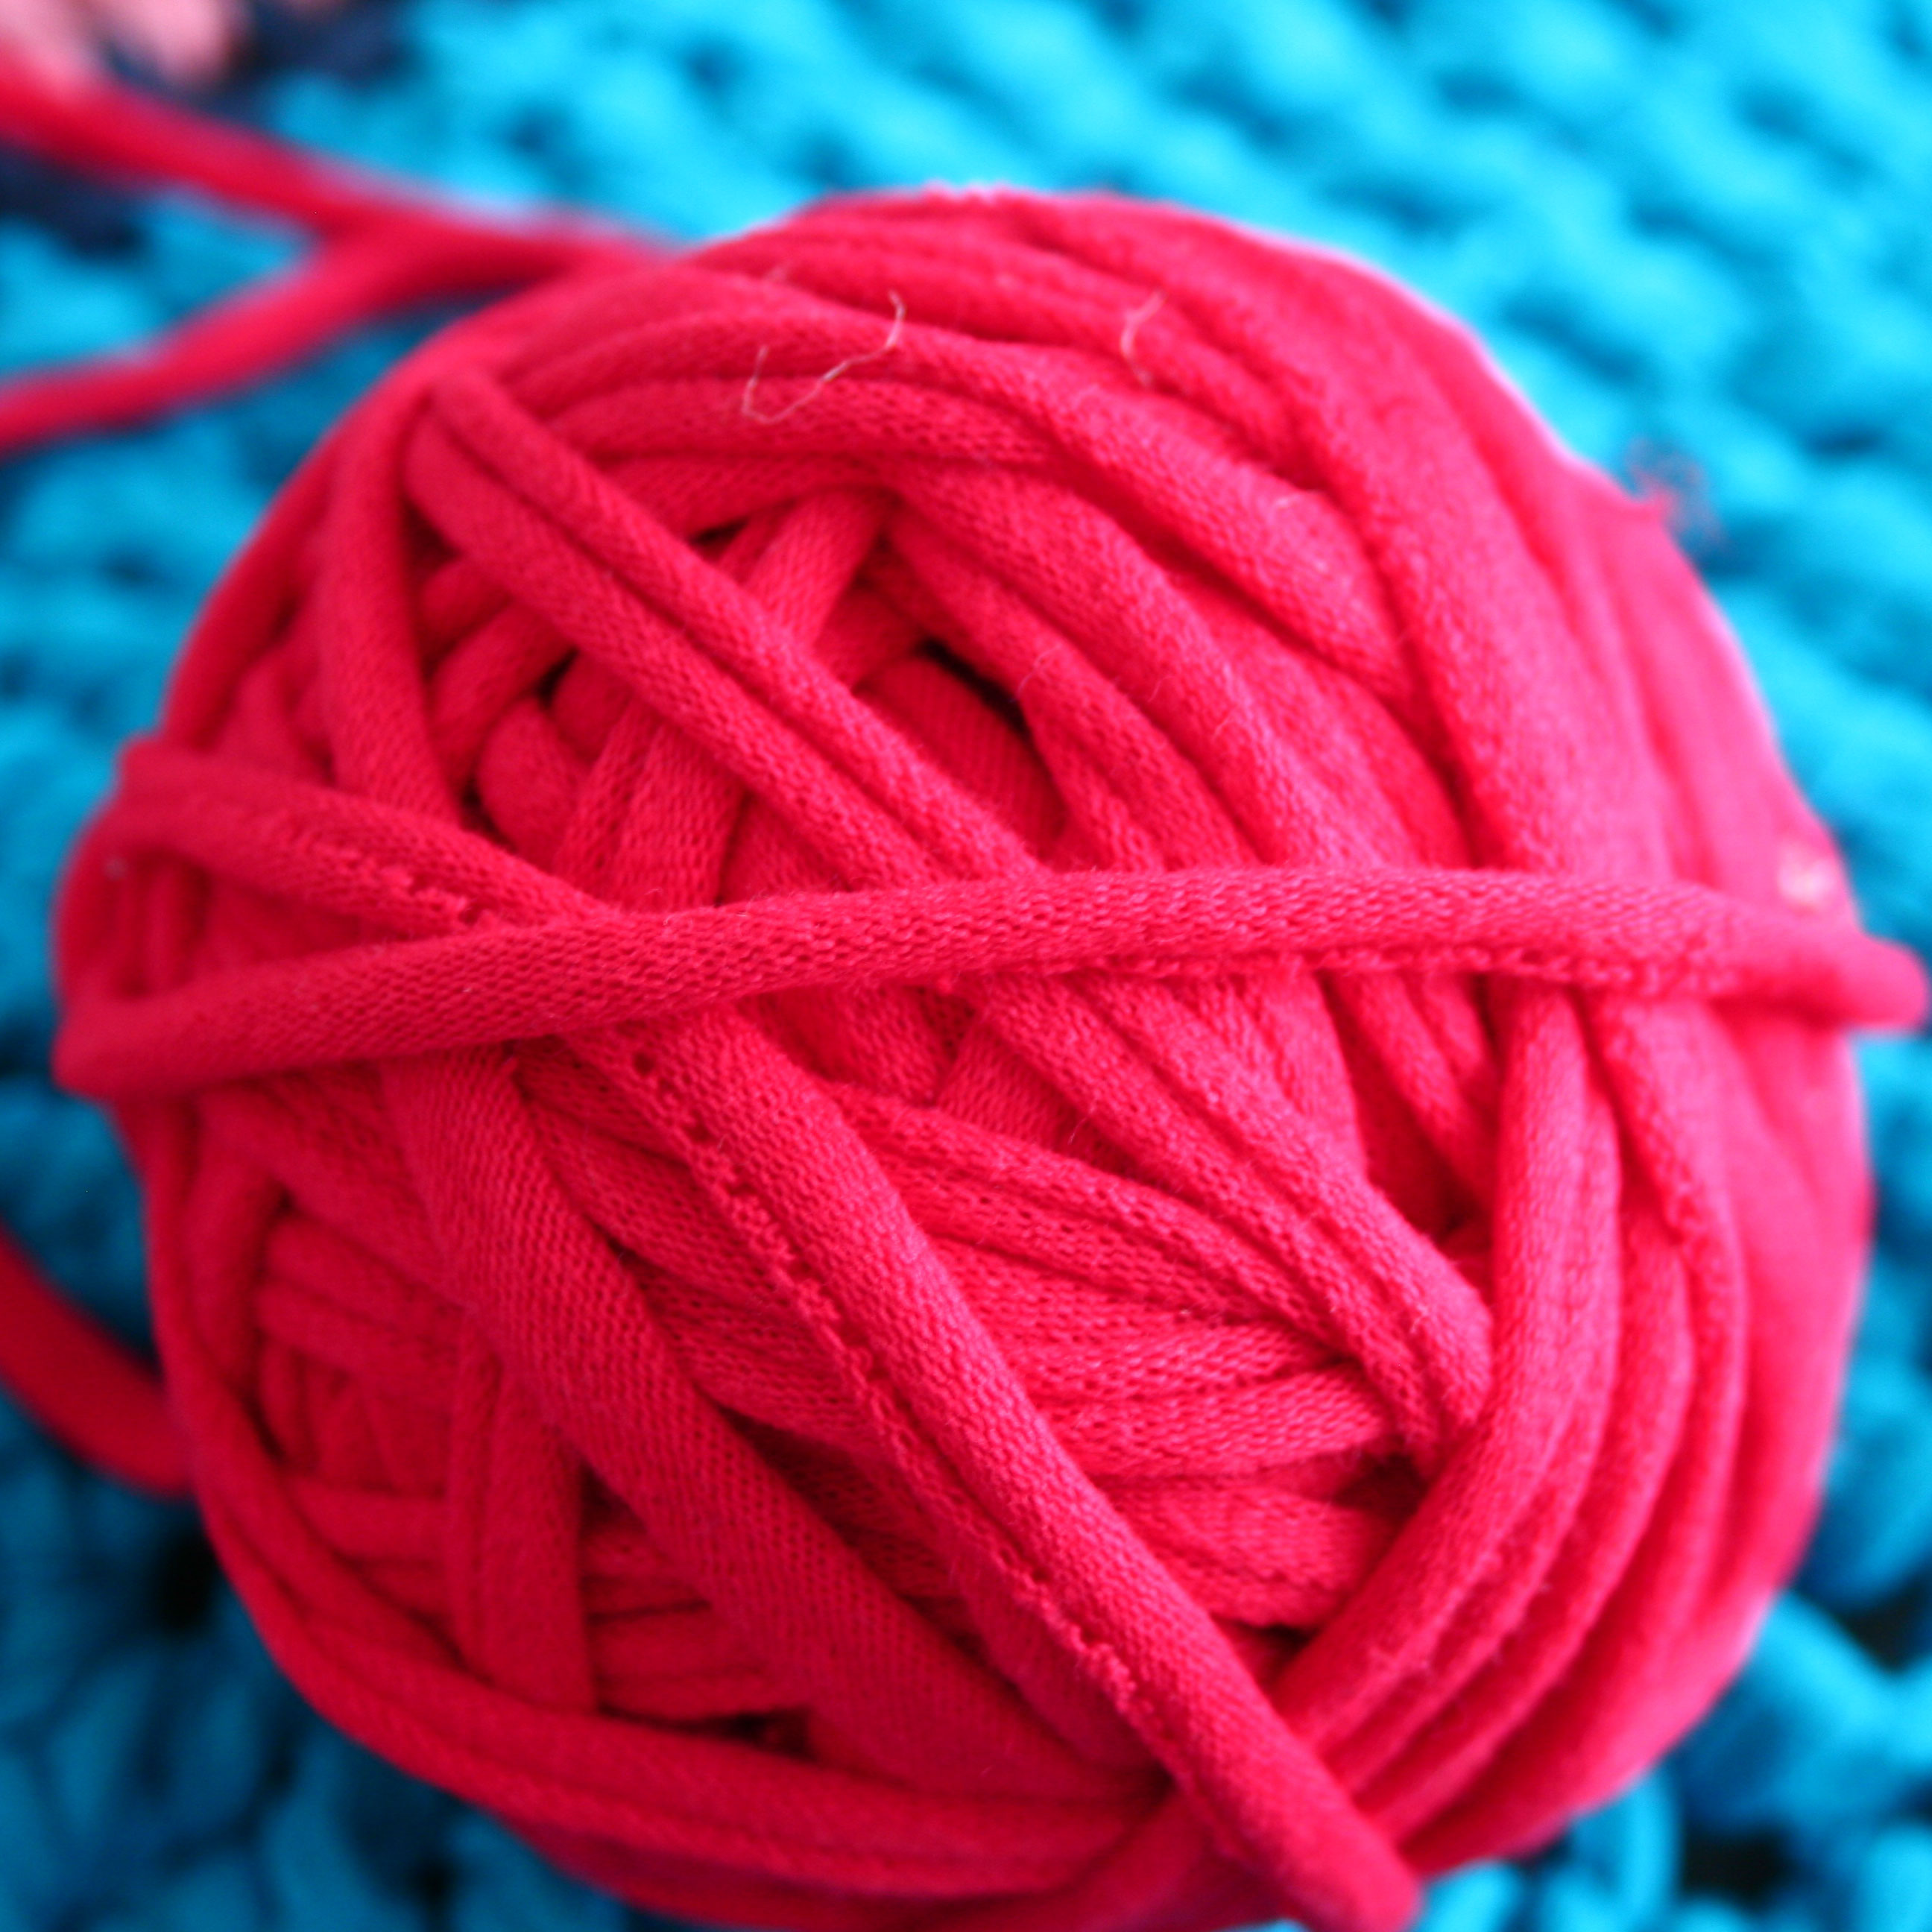
What the yarn looks like
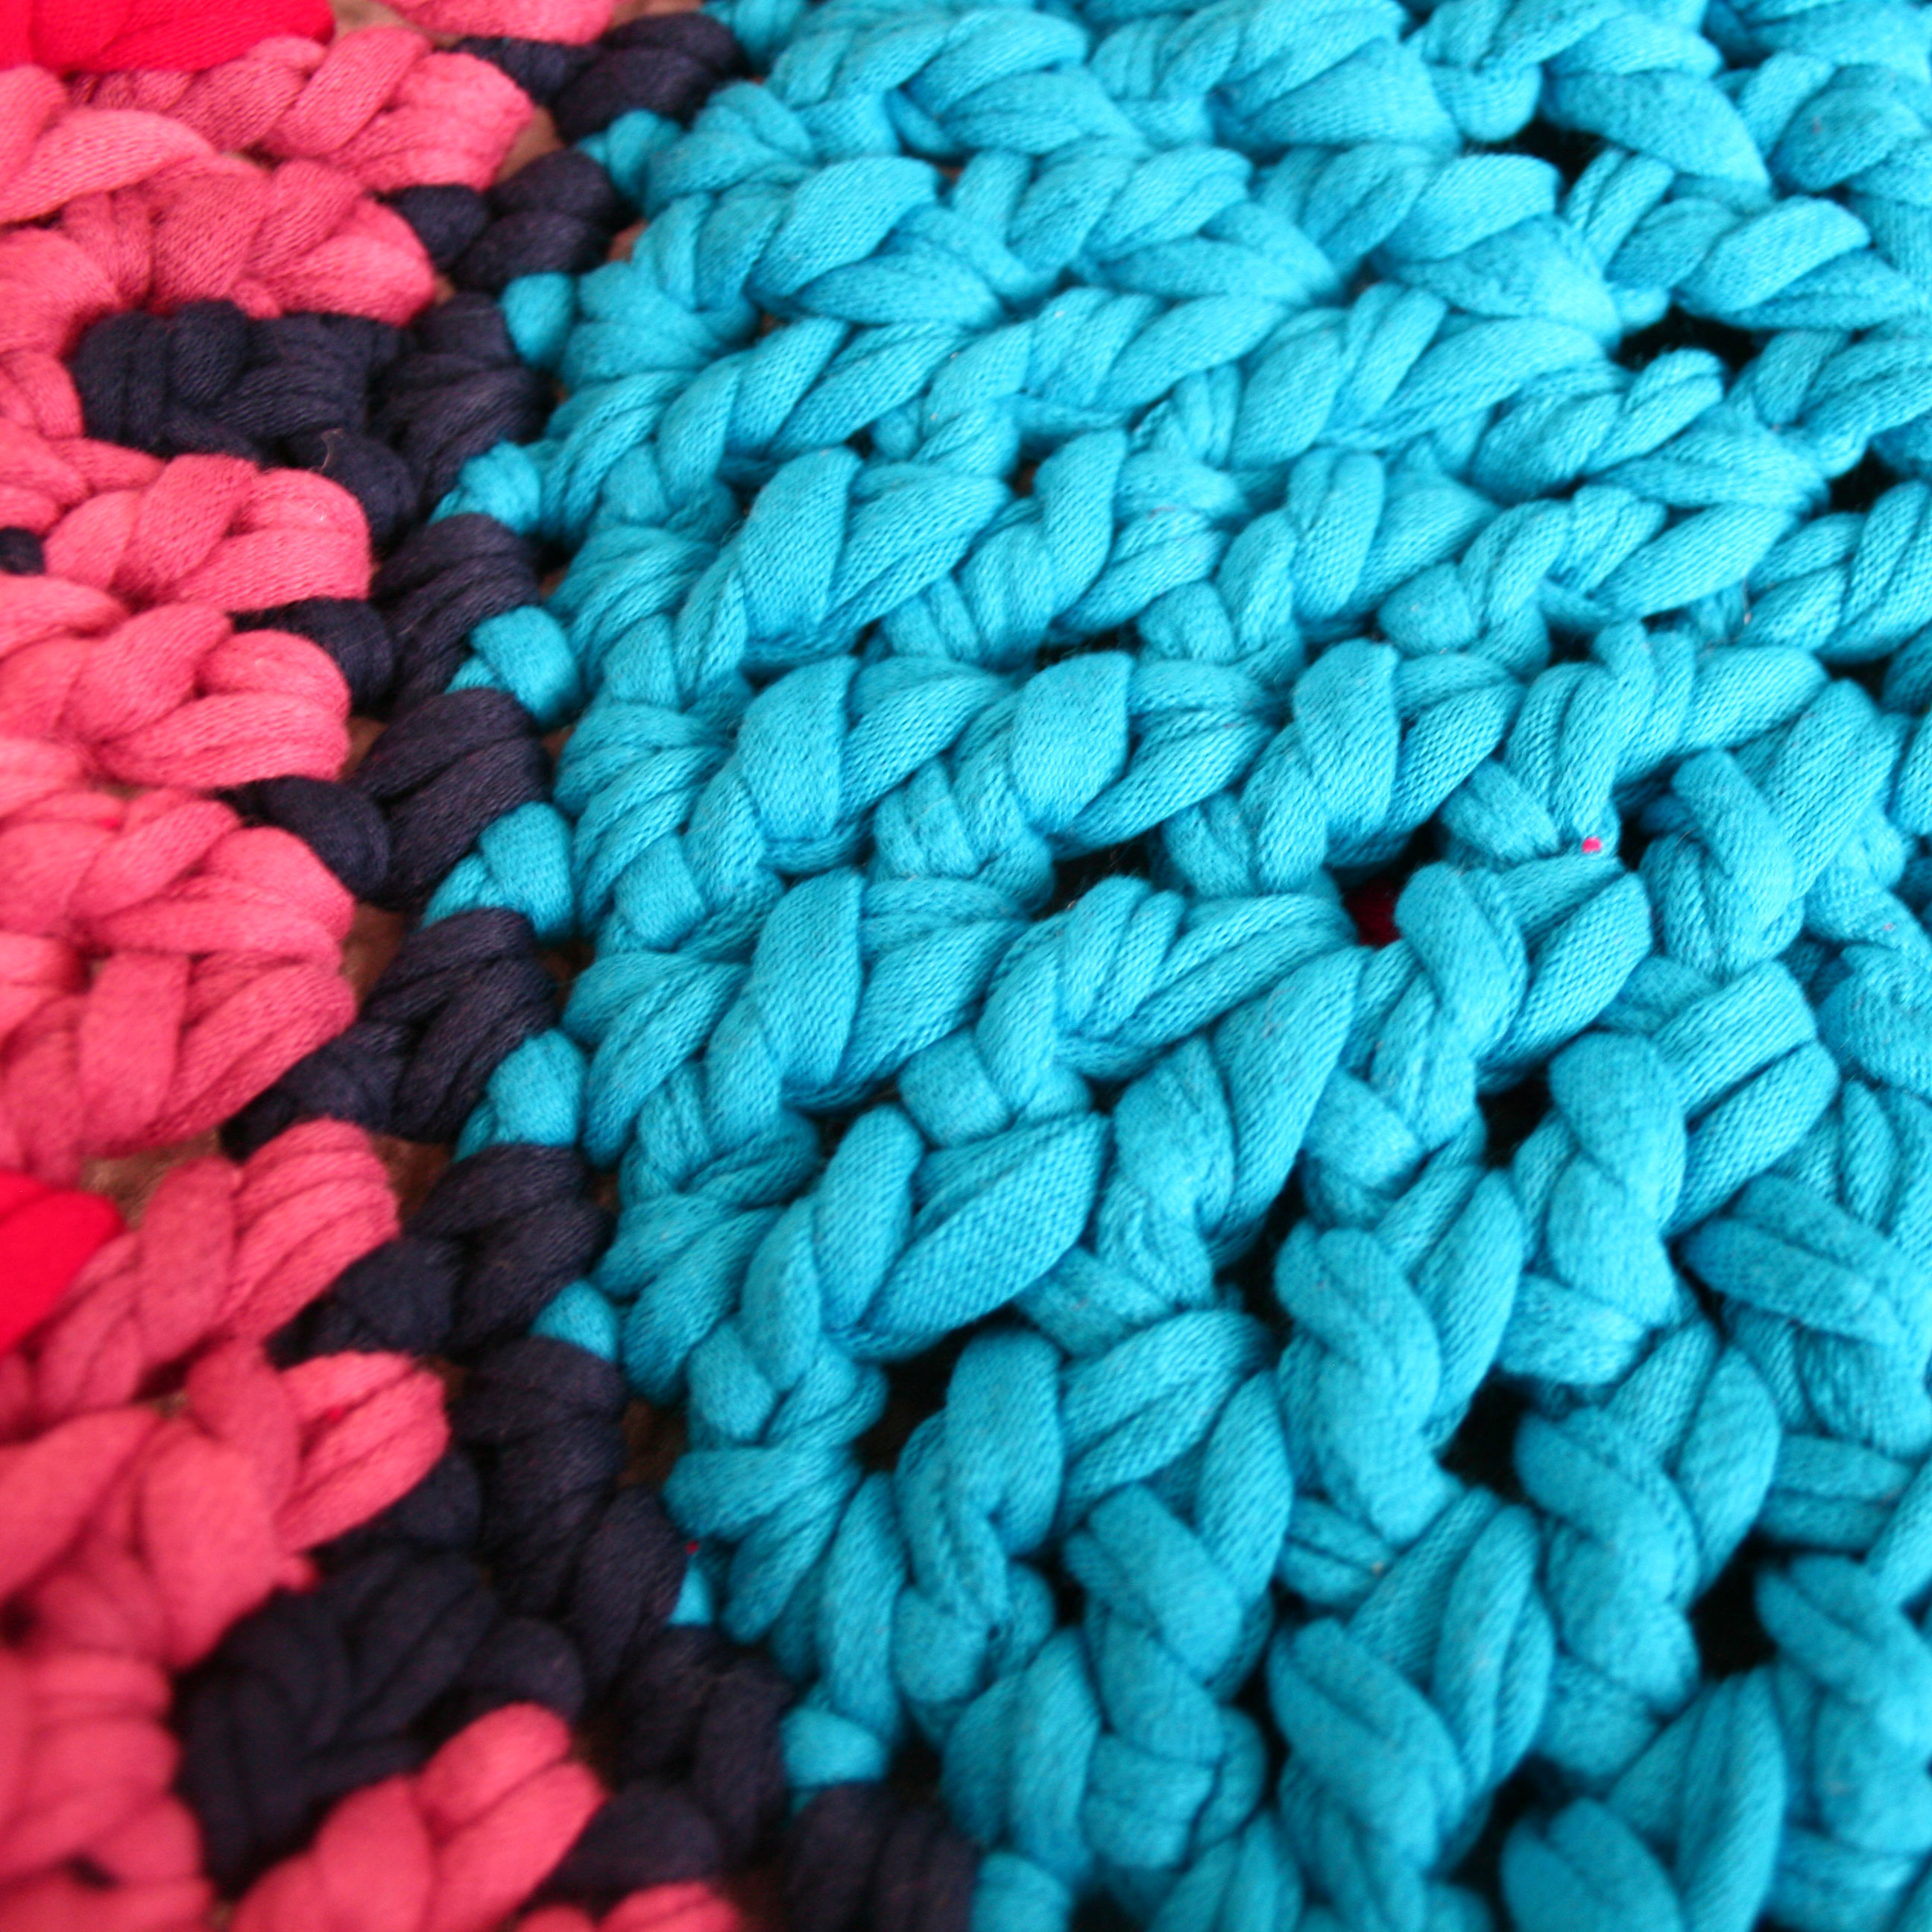
Close up on crochet
St. Patrick’s Day Wall Hanging
I love St. Patrick’s day. I love it because my favorite color is green. I used to hate it, I’m not a fan of pinching. The point is that I’m excited about this week’s craft because it’s GREEN!
I started with some green cotton yarn (my favorite is Peaches ‘n Cream brand but Walmart stopped carrying it. Jerks replaced it with a brand with a similar name but not similar quality. )
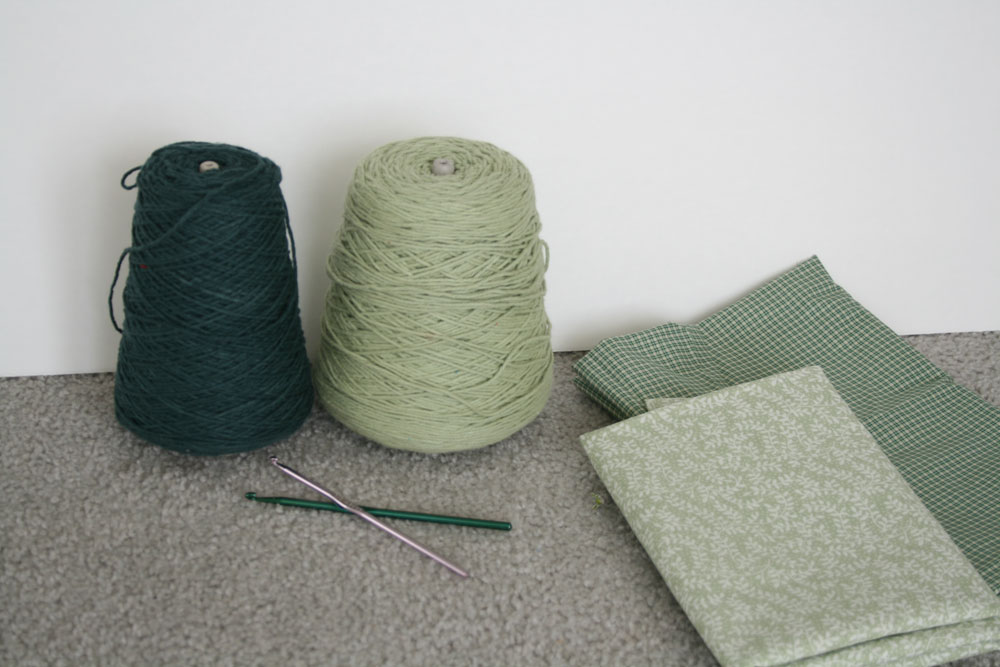 I buy my cotton on cones but I’m sure that you could make this with a couple of balls of one color and one ball of the other.
You will need :
2 Colors of green cotton yarn
H and a G crochet hooks
1/3 a yard of 2 different green printed fabrics
a sheet of foam board
a glue gun.
cut your fabric into 12 inch squares. Two of one color and one of the other color. Then cut your foam board into 10 inch squares. I use foam board because it’s cheap (i get mine at the dollar store), and because it’s light weight. I can hang my finished product with blue putty sticky stuff and no walls are damaged.
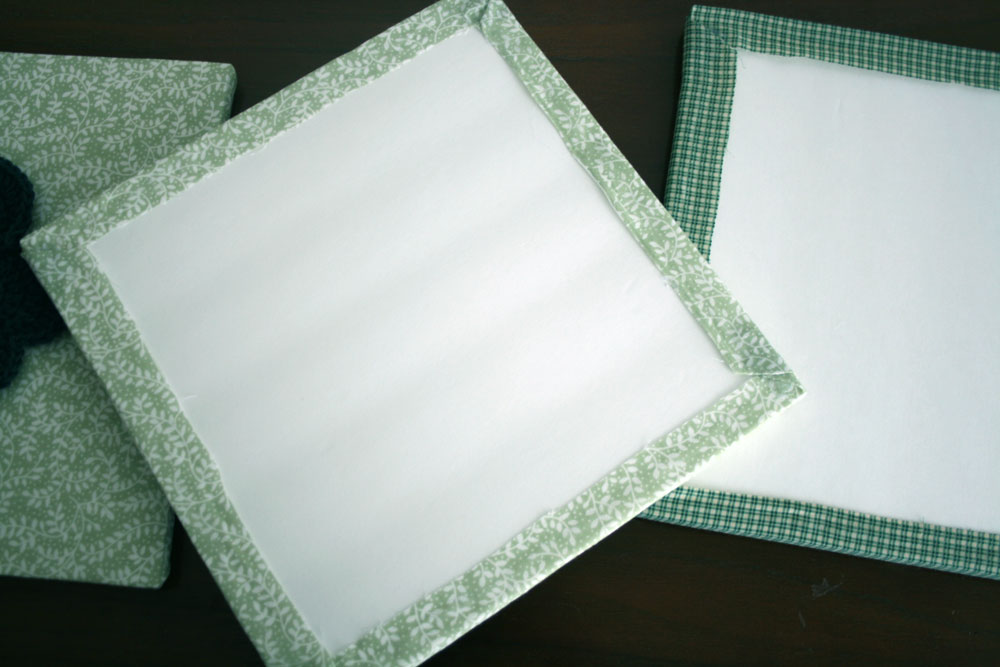
I wanted these to look like canvases so I glued together 2 squares of foam board to get a thicker look. Next, using a glue gun I stretched the fabric over the foam board and glued it around the edges on the back.
All you need now are some shamrocks. My large shamrocks were made from a pattern for shamrock potholders designed by Priscilla Hewitt. I made 2 but I only made the front side of them (the pattern tells you to make it double sided). Next I made a whole bunch of little shamrocks using a pattern from Suzies Stuff. They are super fun to make. I glued one big shamrock in the center of two of the squares then glued the little shamrocks on the contrasting square. That’s all. 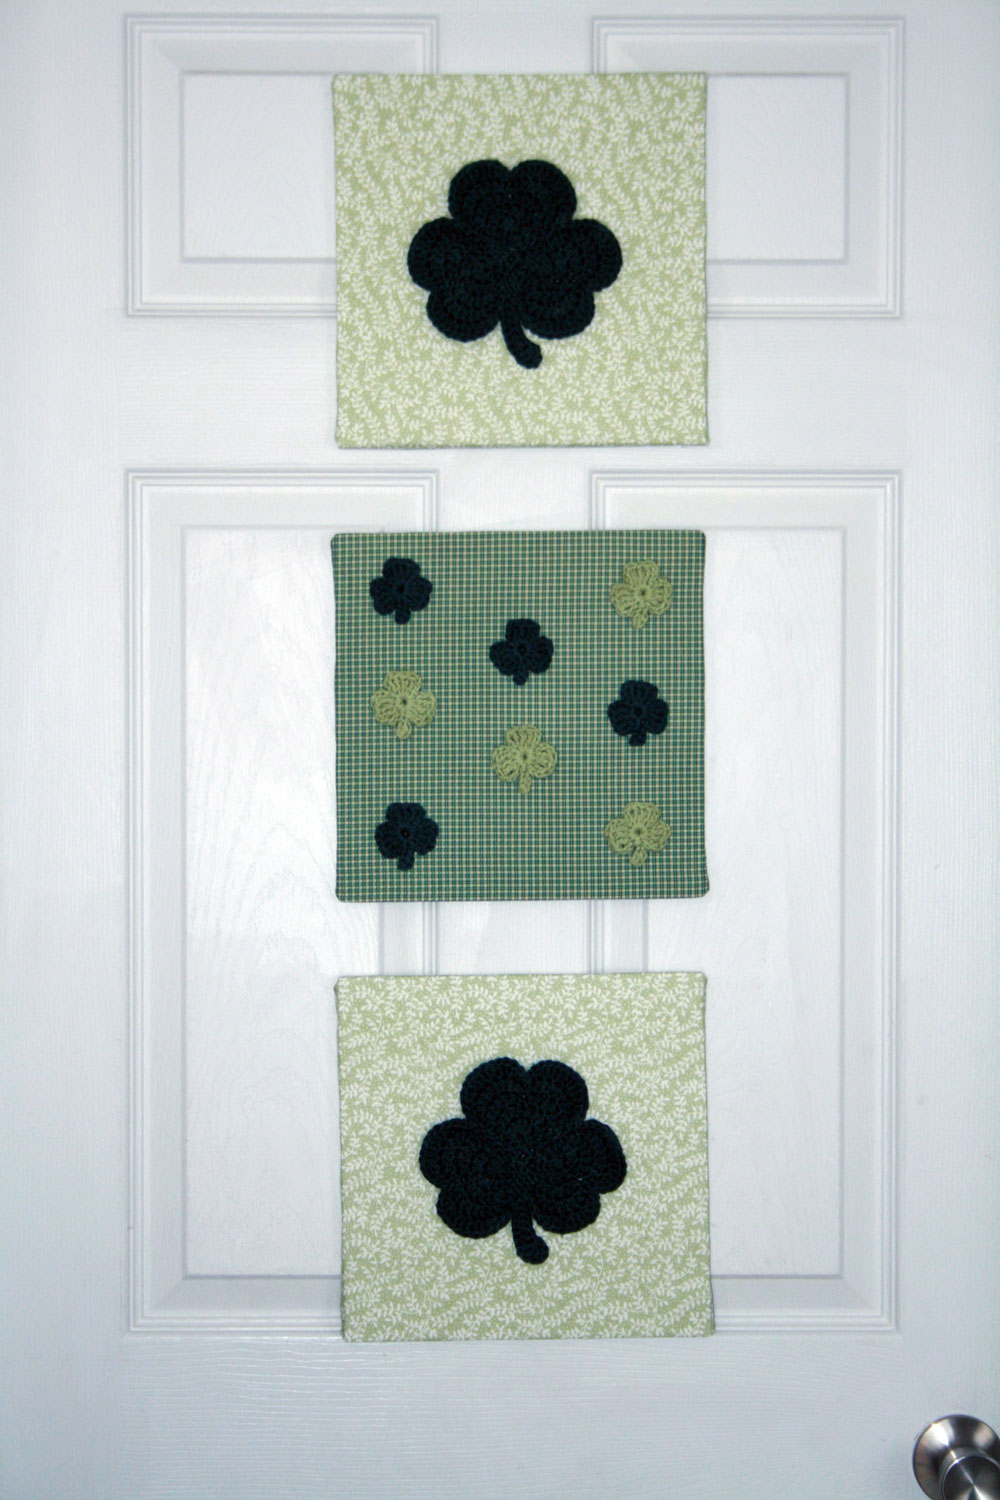 UPDATE: Sorry about my spelling in this post. I really need to proofread better. Also, I love my camera, she’s my dear friend, but sometimes we don’t get along at all. She’s being mean to me lately and we’re working it out together but in the mean time my photos look bad. We both apologize.