Qtip Snowflakes

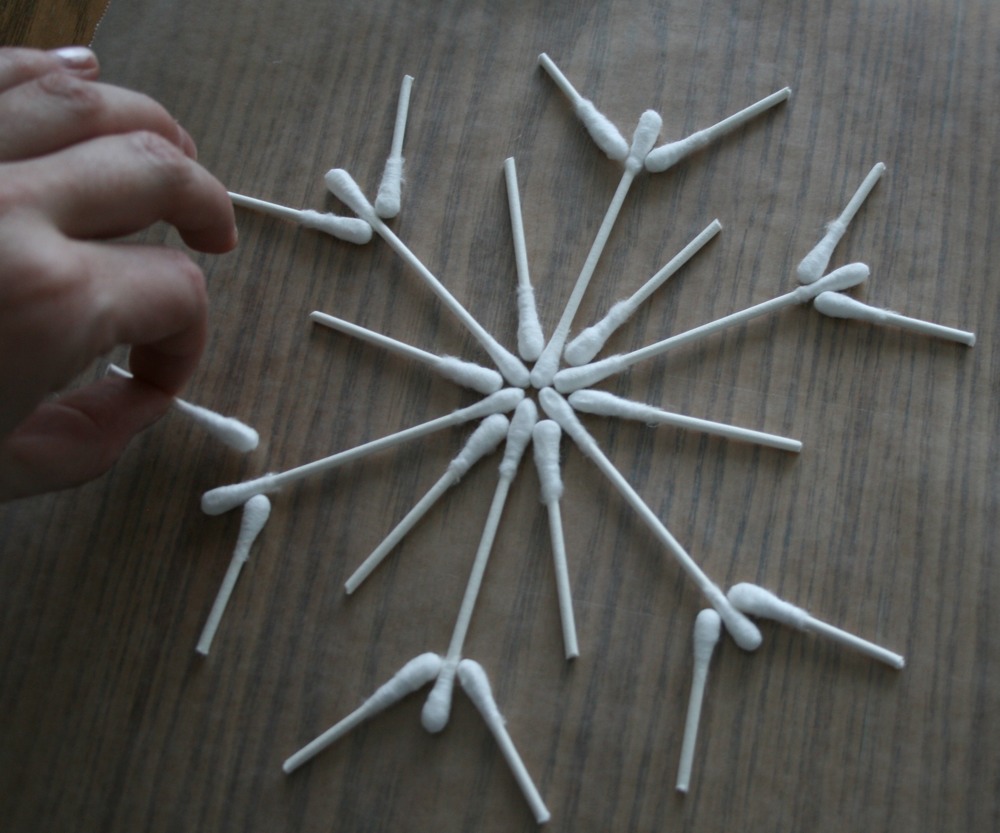
I thought this would be a fun craft to do with my kids. My kids never got into it, but it kept me entertained. I first saw these snowflakes in Family Fun magazine. I love them because they are super cheap, they are easy to make, and the results are quite pretty. Here’s how it’s done:
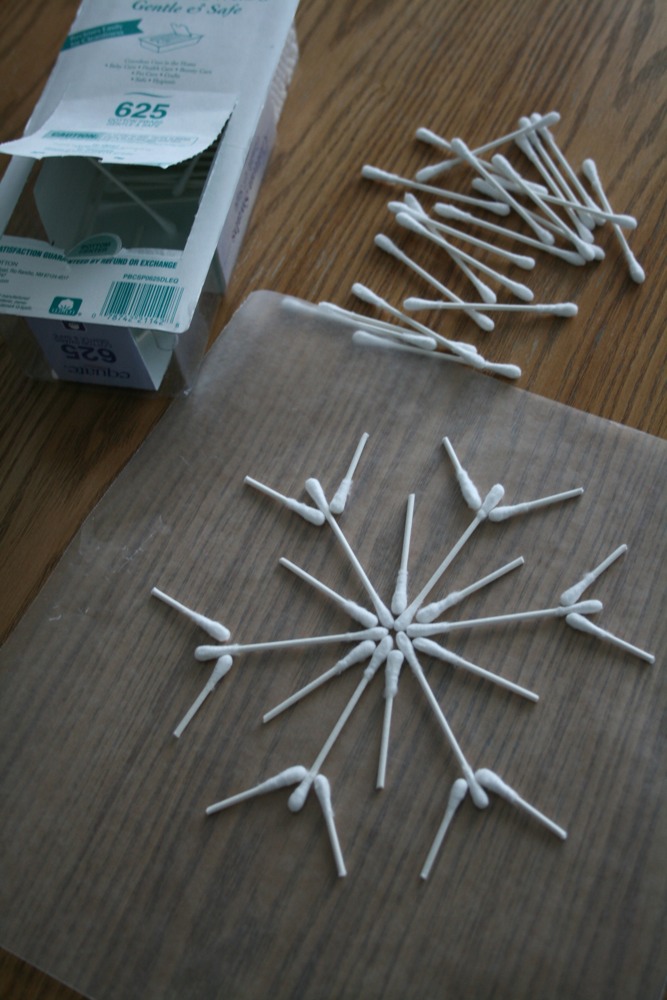
You will need: Q-tips (I like the kind with the cardboard middle instead of plastic), a sheet of wax paper, and some glitter glue.
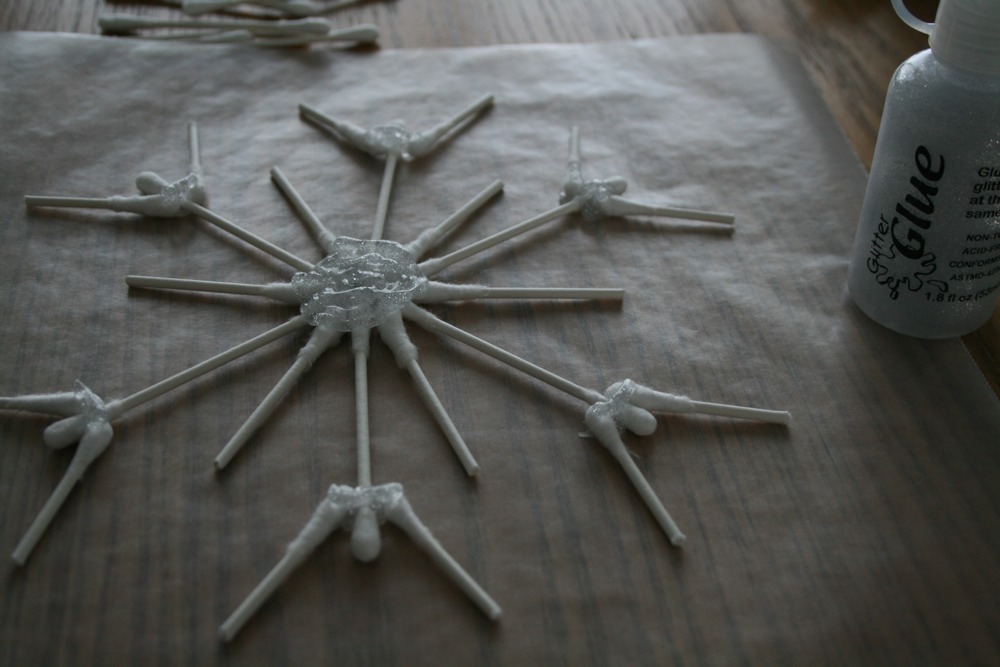
Glop on some glue. You want to be generous with the glue. Your snow flake is light weight but it won’t stay together without a good amount of glue. You really need to let this dry over night. You can watch it and check on it pulling off little branches to see if they are sticking, but that would just be silly because I’m telling you now that it needs to dry over night.
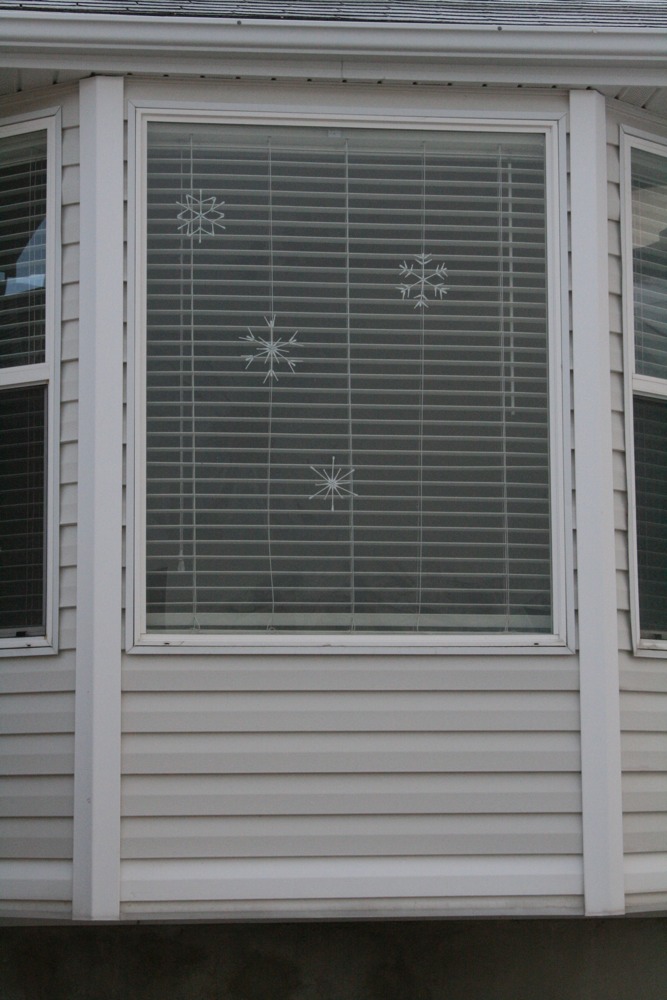
Finally, tie a piece of fishing string to your snowflake and hang it in your window. Then wait for the compliments to roll in.
Bats and Science
Halloween is my favorite crafting holiday. It is pure silliness and fun. I’ve been anticipating Halloween crafts for some time now and I’m excited to post some of my fun ideas. Or rather, some fun takes on others ideas. Recently I bought 1200 coffee filters. It’s coffee filter crazy around here! Have you ever dyed coffee filters? I looked online and found a few ways to dye them but my favorite is to use food coloring. Here comes the science. I wanted to make bats wings out of coffee filters so I wanted to dye them black. How do you get black food coloring? I really don’t know. I tried adding a little of every color of food coloring that I had that seemed to work, until I submerged the filters. I like to sit the filters in the colored water bottom first and then let the water soak up the filter. It’s just neat to watch. Something surprising happened though, the dye began soaking up the filter in a weird way, the blue was creeping up the edges faster than the other dyes.

I did not understand why but even when I put only a tiny bit of blue dye in, my filter turned blue on the edges. I had to know the reason. After a long night of google searches I finaly figured it out. Apparently it’s called chromatography and the gist of it is that blue particles are smaller and therefore lighter weight so when traveling up a coffee filter by osmosis they move faster against gravity. Facinating. There is nothing better than when crafting and science come together! (If you want to read more on Chromatography and Osmosis, you can read about it on pbskids.org and exploratorium.edu)
Back to the bats; So my filters turned out pink in the center and blue on the edges. Not cool. We tried water color paints but they just didn’t spread well and looked wrong. finally I just dyed them agian with the food coloring, this time submurging the filters completely in the dye so that the blue didn’t travel anywhere. They still ended up purple, but it was good enough for me.
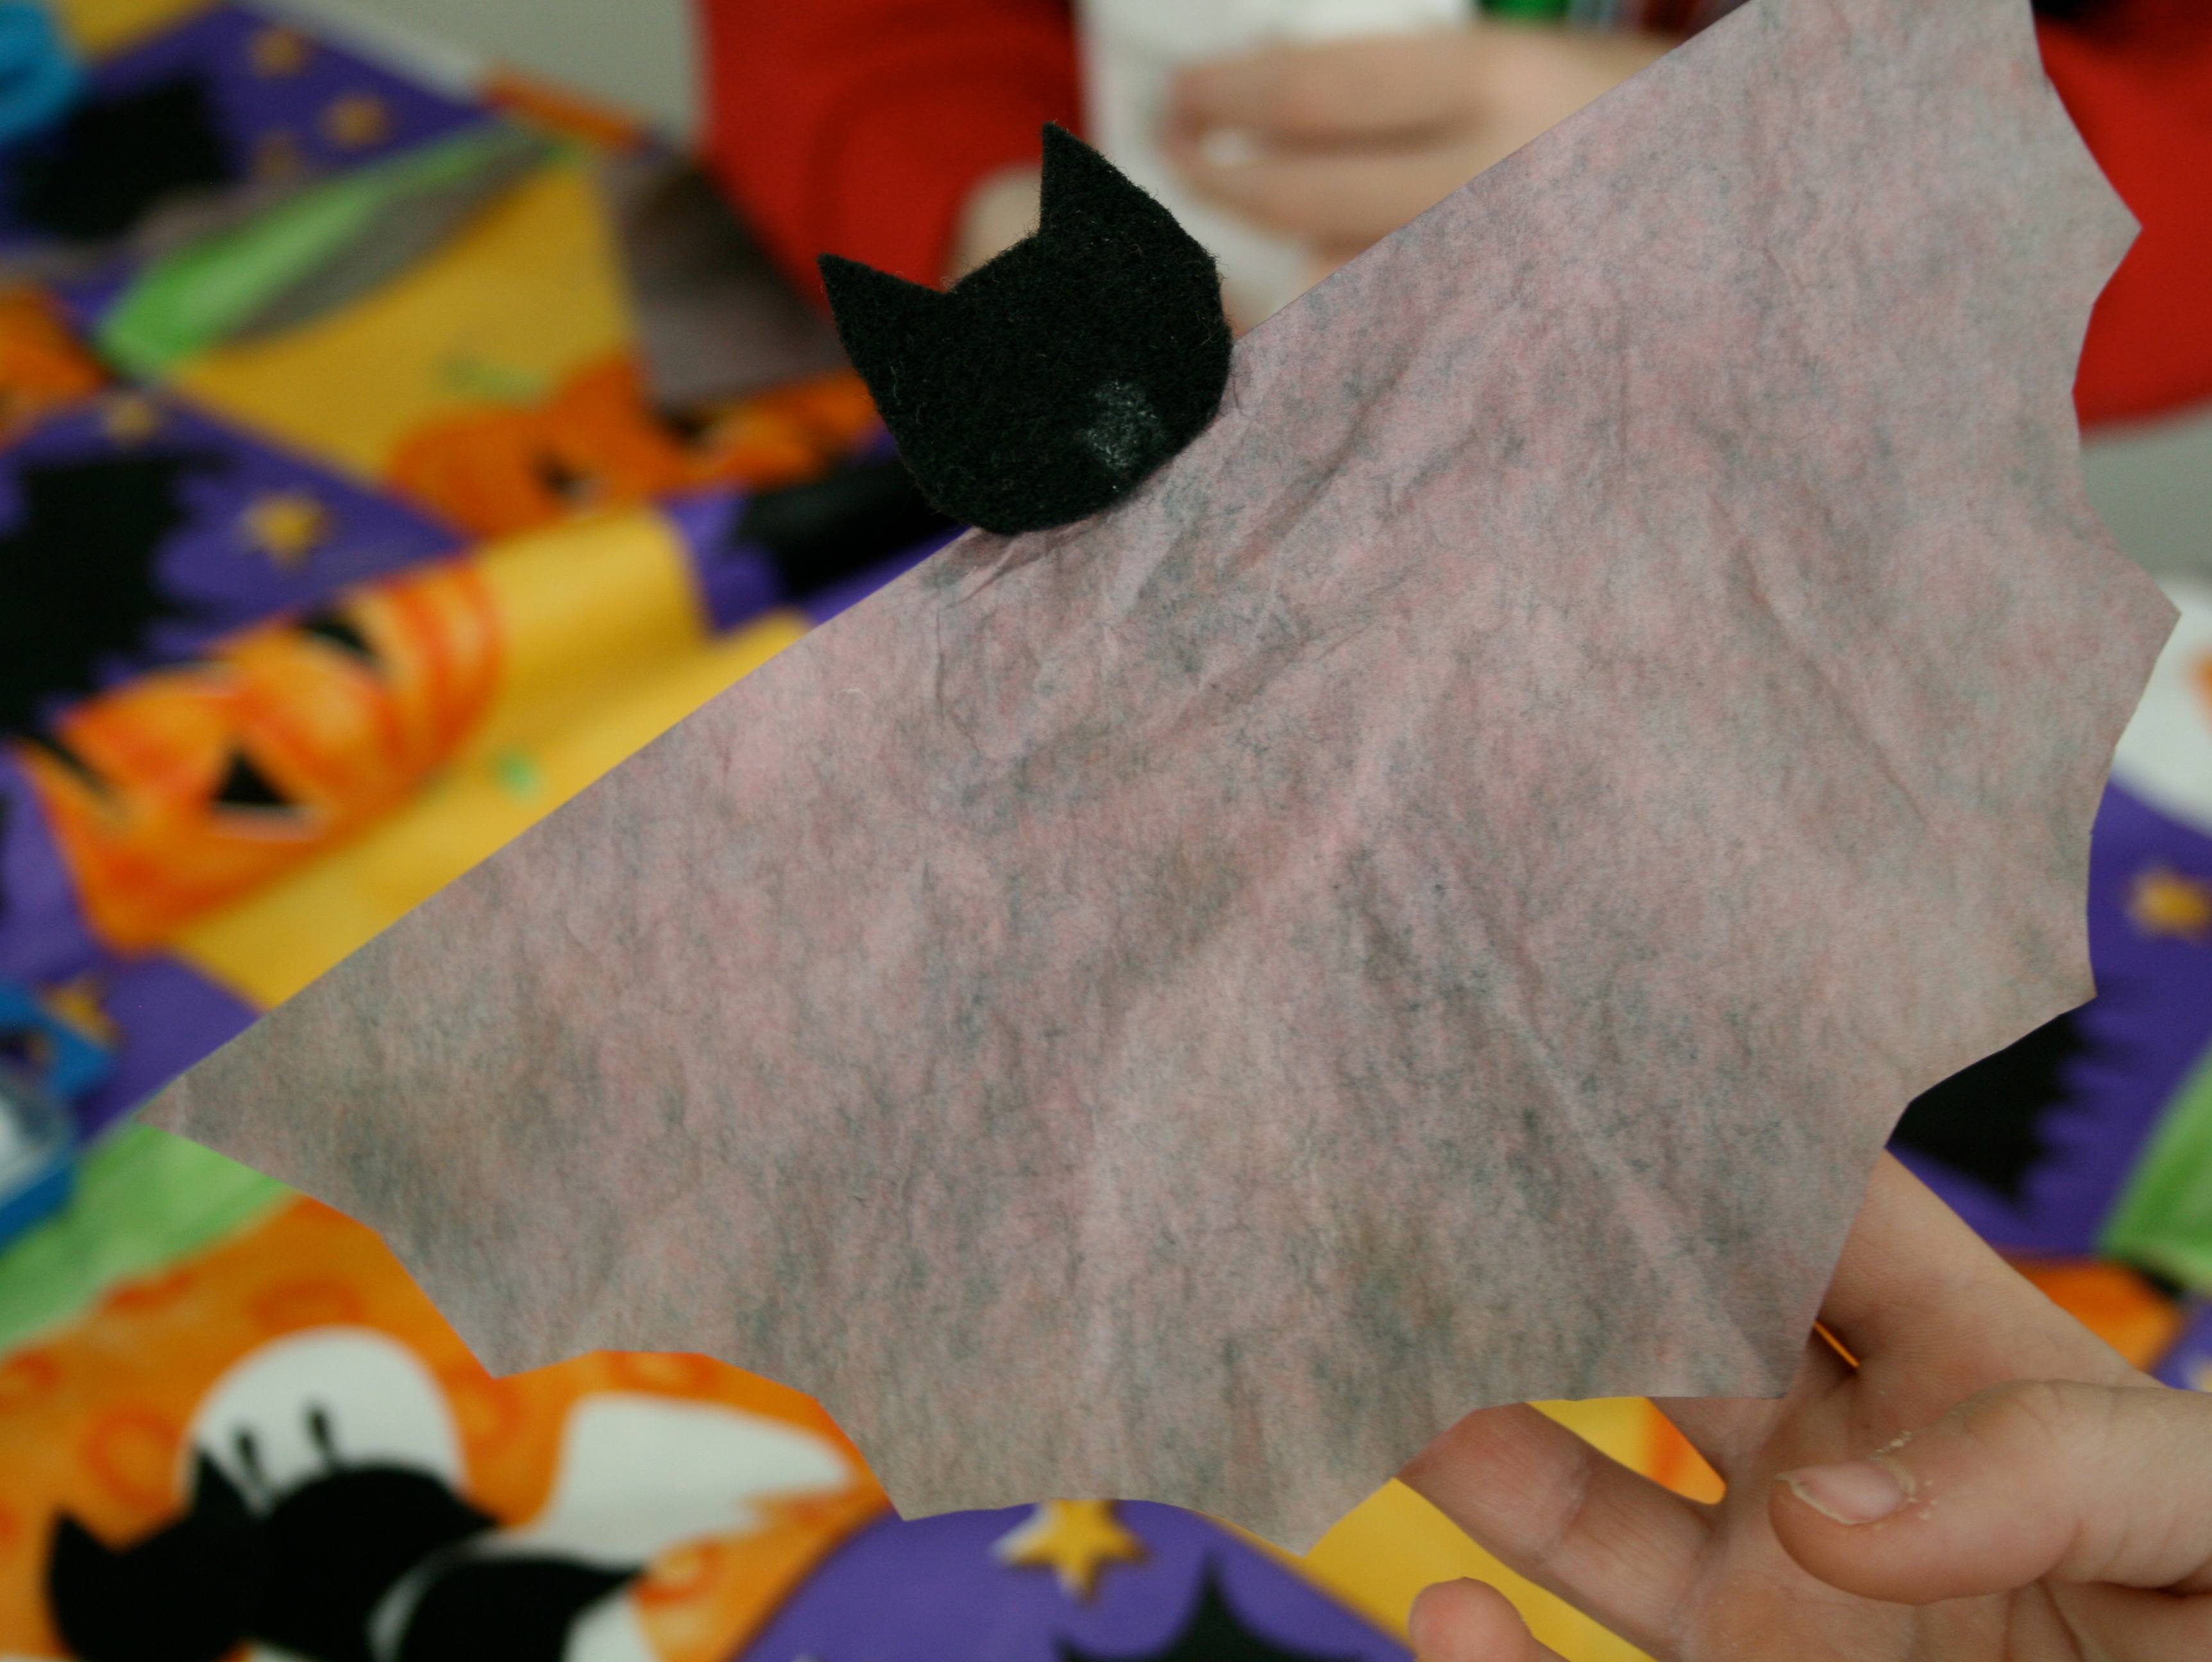
After the filters had dried I folded them in half, then in half again. I drew a bat wingy shape and then the kids cut along the lines. We unfolded one of the folds so that the wings were all double. (still folded in half, but not folded in quarters.)
 We applied a line of white school glue along one side of a clothes pin. Stuck the center of the wings to the clothes pin and then added a head that I had earlier cut out of felt. I would put patterns here, but I always just free hand stuff. When these were dry, we decided we’d like to put them in the window so we wanted them to be double sided. All that entailed was flipping over the clothes pin and glueing the wings and head the same way on the other side.
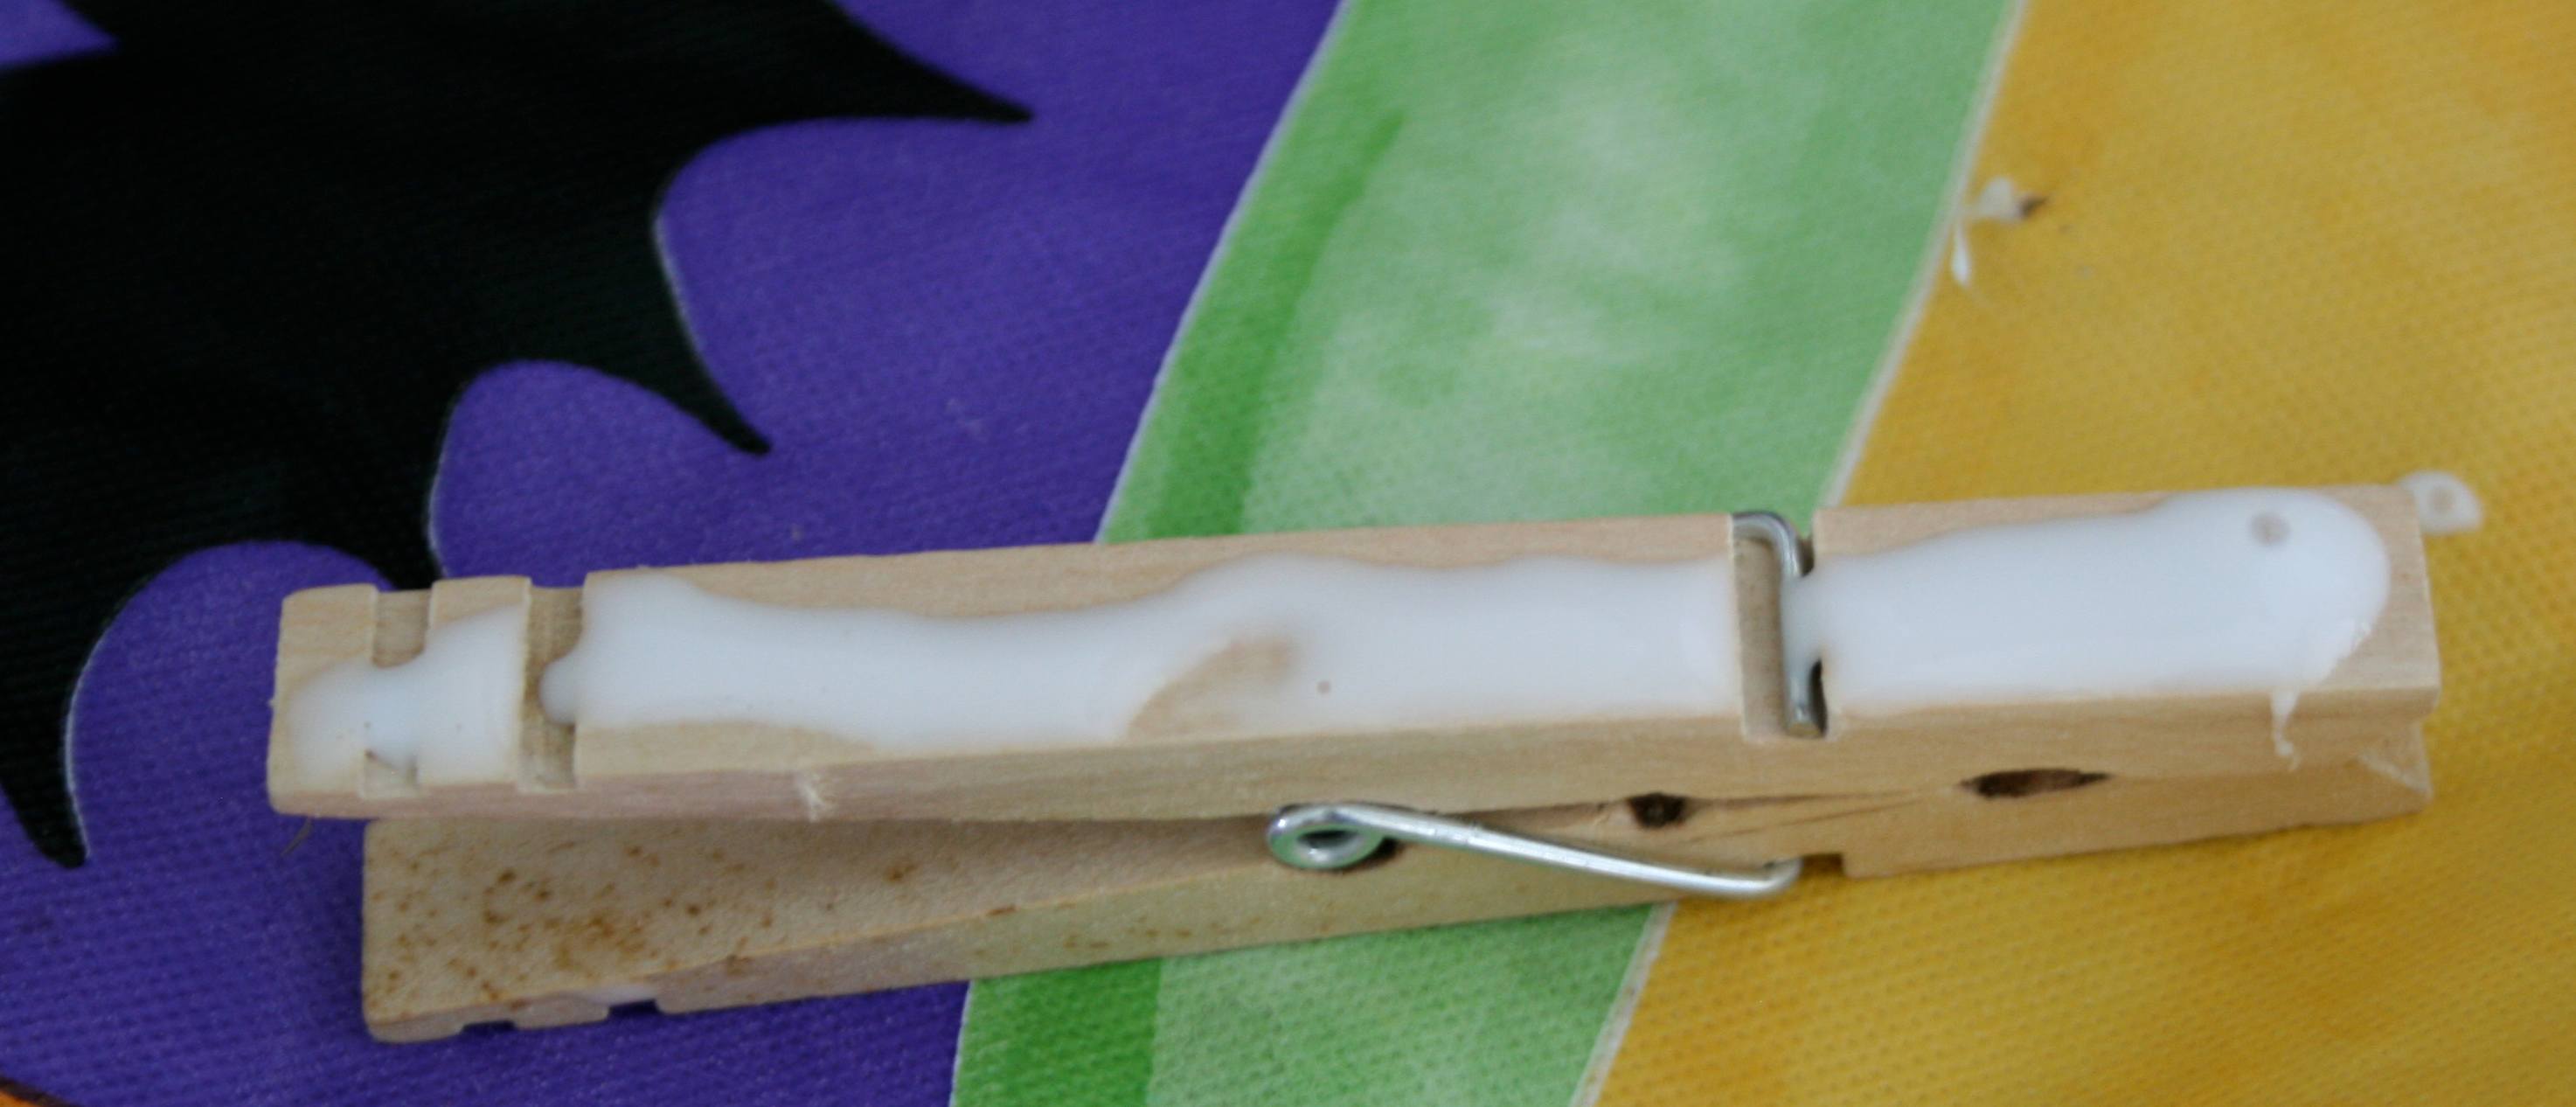
To make them into a garland we strung a piece of yarn across the window and just used the clothes pins to clip onto the yarn. This makes it easy to move them around if you want to.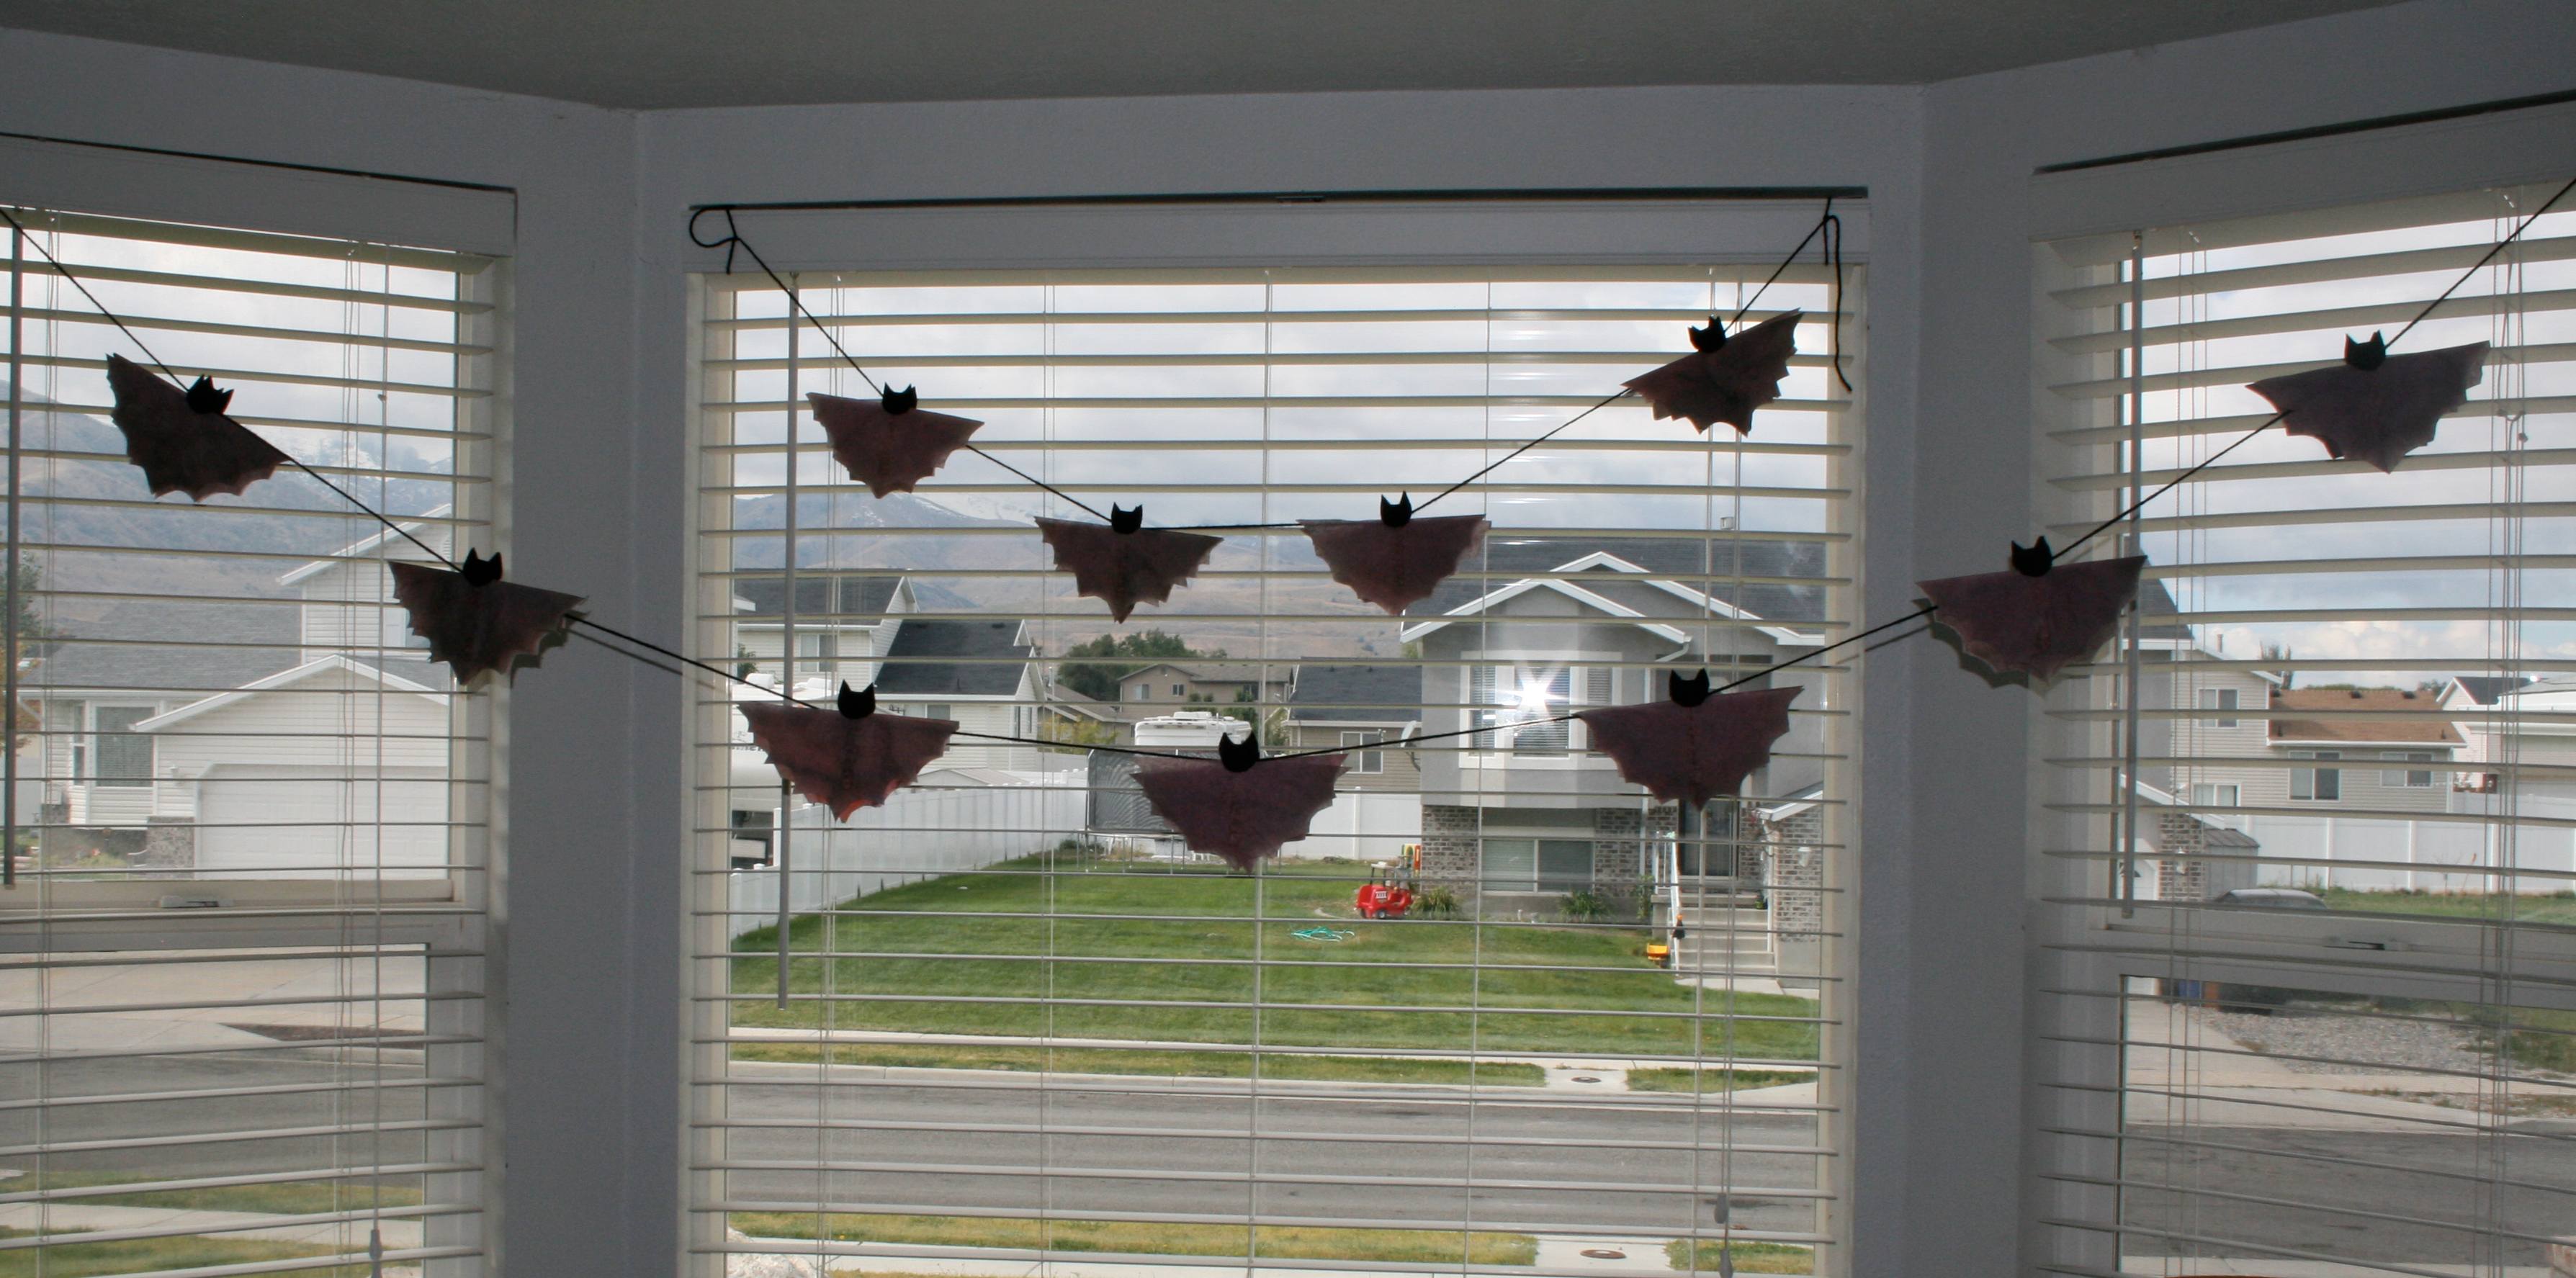
Finger Knit Bracelet
Hello devoted reader. Wow is it just me, or did summer fly by? It’s been a mad dash to get in all of the fun we possibly could. We vacationed, we camped, we swam, we reunioned, We’ve done it all! Now it is time to get back to some sort of routine. School is back in session, and so am I.
I don’t make new years resolutions but I make back to school resolutions and this year I have many. The usual resolutions like lose weight, eat healthier, craft more, things like that. So my drive to craft is only stronger now than it ever was. And boy do I have ideas. They float about my head just waiting to be made and then blogged about. These crafts in my brain are still un-crafted though so for a little while I might have to post some things from the past. Here, for instance, is a lovely bracelet that I learned to make a while ago. 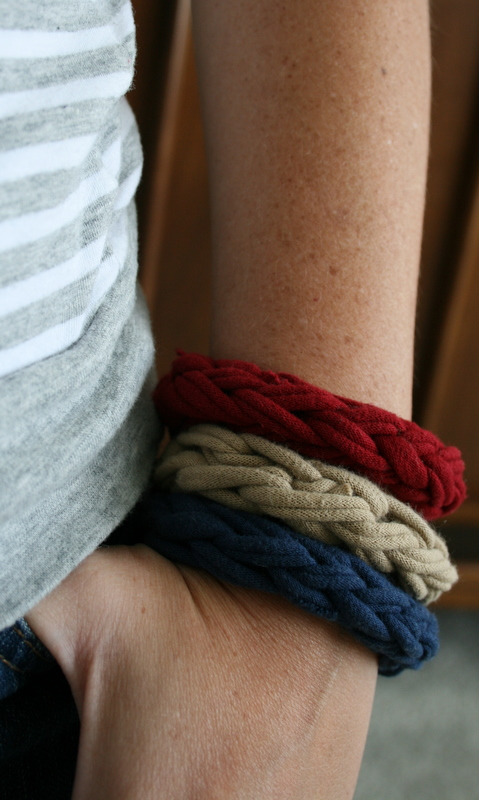 Have you ever tried finger knitting? Well I saw a lovely post by V and Co. on how to make a finger knit bracelet out of t-shirt yarn. Remember how I love t-shirt yarn? Well, dear reader, I saw this and I simply had to make one
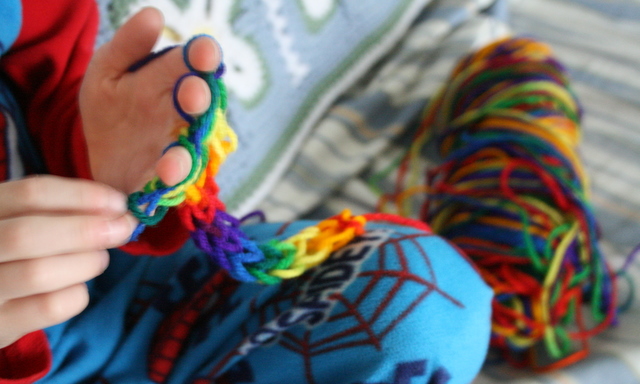
I had never once finger knitted though. Crazy thing is, I had a lot of trouble with it. I can knit up a storm, but finger knitting proved challenging. I think it was because I just couldn’t understand it using only the photos on V and Co.’s web site. I found a video that helped though (this is a different technique than is shown on the V and Co website, but the results are the same.) Once I got the hang of it, my little 7 year old wanted to learn. He’s awesome at it, as you can see. 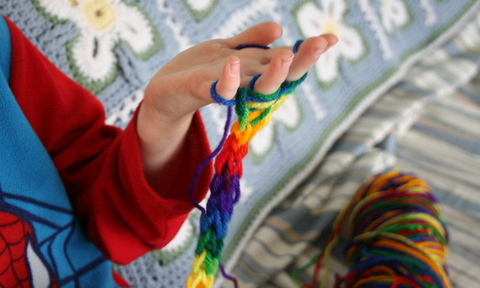 Well once you learn, it’s as easy as can be to make a bracelet out of T-shirt yarn. I made one the other day in the car on my way to a wedding (I wasn’t driving). Seriously this takes 10 min to make. You can make them out of anything too. Jersy knit is stretchy so it makes it a little easier but wouldn’t it be lovely to make one out of rope? Oh or ribbon, or wire? So many options.
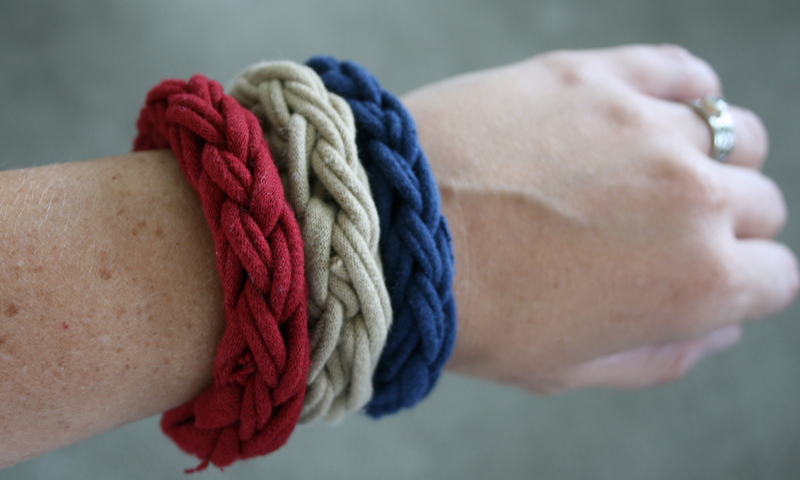
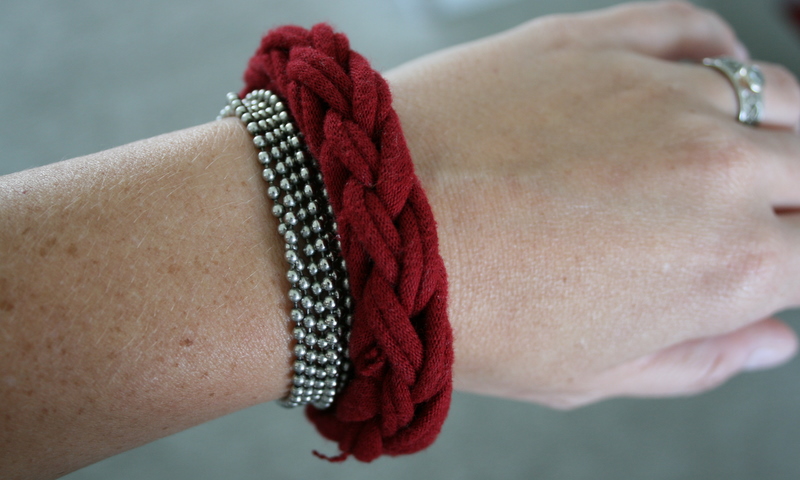
Jammie Blanket
A while ago my dear friend Liz told me that her baby loves feeling jammies when he goes to bed. He can only sleep with a soft fleece pajama to love. She wondered if I could make a lovey blanket from a pair of his pajamas. I was up for the challenge, though not exactly sure what to do. She said that he loves the softness of the body of the pajamas, and he also loves to play with the snap that goes over the top of the zipper. Here’s what I came up with. ![]()
First of all I removed the zipper (I got a free zipper out of the deal…sweet!) I just picked it out with a seam ripper. I needed the extra fabric that was sewn to the zipper to close up the center of the blanket. Next I cut across the top just under the arm pits and the bottom just above the crotch. ![]()
![]() I made two of these blankets so on the first one I cut up the sides to make them look straight and even. On the second one I decided that the baby doesn’t care much for straight and even so I left them the way they were. Slightly bigger at the bottom and smaller at the top. I wanted to add that snap bit from the top but I also thought it would be fun to add other things around the sides. I used fabric from the sleeves and legs of the pajamas to make loops and stuff. I used the snap bit as a pattern and made 5 more of the same shape. I included in that one that took in the other side of the snap. That way there were two snappy ends to play with and when he’s older he can even snap them together. I made tubes of fabric from the extra and folded them in half to make loops.
I made two of these blankets so on the first one I cut up the sides to make them look straight and even. On the second one I decided that the baby doesn’t care much for straight and even so I left them the way they were. Slightly bigger at the bottom and smaller at the top. I wanted to add that snap bit from the top but I also thought it would be fun to add other things around the sides. I used fabric from the sleeves and legs of the pajamas to make loops and stuff. I used the snap bit as a pattern and made 5 more of the same shape. I included in that one that took in the other side of the snap. That way there were two snappy ends to play with and when he’s older he can even snap them together. I made tubes of fabric from the extra and folded them in half to make loops. ![]()
On the main blanket, I turned the fabric so that right sides were facing in and sewed together the place where the zipper was. I used my seam ripper and picked out places on the sides where I wanted my loops and stuff to go, put them into the holes I made (careful, you want the part the baby is going to play with on the inside of this blanket sandwich. Only the rough end should be poking out where you can see it.) and sewed the holes closed. Then leaving a wee hole to turn the whole thing right side out I sewed around the whole blanket. Finally I turned it all right side out and ran a top stitch over the whole thing. I like to make sure the little bits around the edges won’t fall off so I sew them, sew them again and then sew them again.
I’m told that Liz’s baby loves his blankets and I have to admit, I’m pretty happy with how they turned out. If I ever have another baby, maybe I’ll make one for him.
Nothing to See Here
Dear reader,
I love you for looking at my blog. I love that you keep me feeling crafty because I’d hate to disappoint you. I thank you for again stopping by to see my messes. The bad news is that my family just got a new computer. It’s lovely and fast but I have no idea how to use it. I’m figuring it out, but its a real shift in thinking. The real problem is that I don’t know how to save photos for the web, so I can’t post photos of my crafty endeavors. I have every intention of learning all this new stuff and posting again really soon. Maybe I’ll even get you a new post next week. Until then check out another of my favorite craft web sites: http://www.oneprettything.com/ Beautiful and so full of inspiration. I hope you like it!
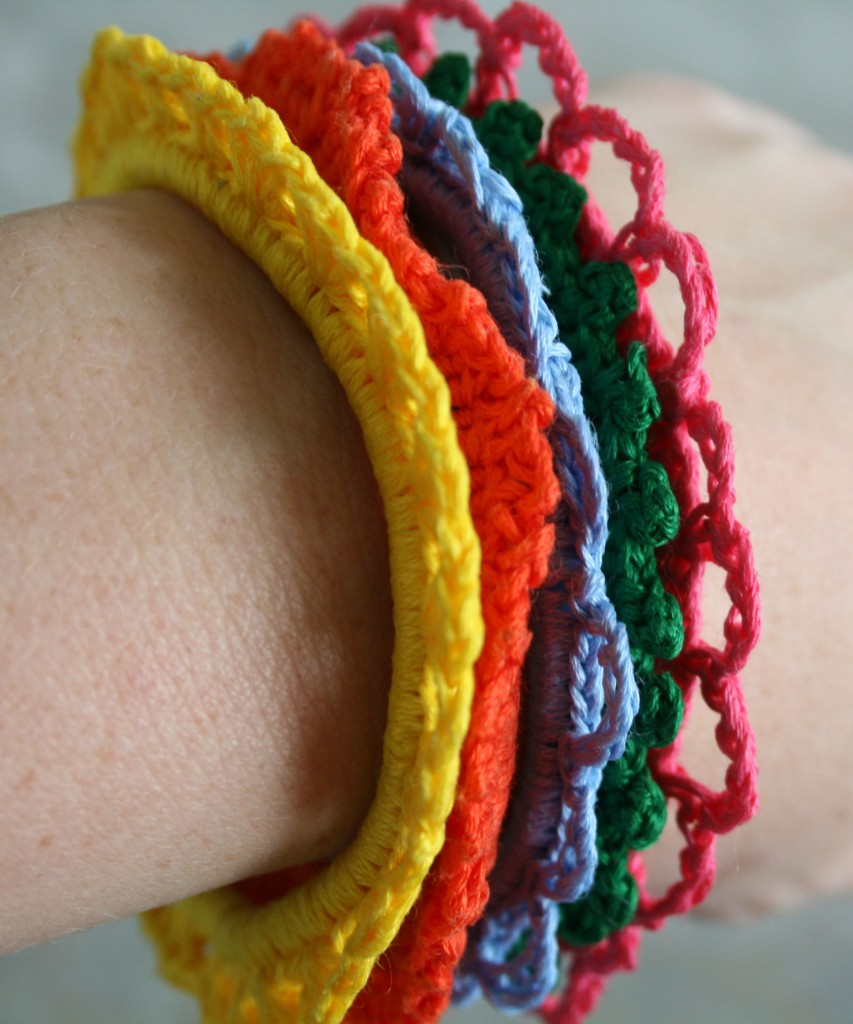
Crochet Bracelet
Welcome back to my blog. I’m sorry It’s been so long. Crafting took a wee vacation from my house. That’s not entirely true but many of my attempts at fun crafts turned out….well….unblog-worthy. After sewing through my finger I decided that maybe I needed to take a break. I’m back though and soon my sister will be contributing to the blog too. She’s awesome so you can get excited.
Today’s blog post is something I came up with about 30 min before church. I wanted a cute bracelet to wear with a new outfit but I didn’t have anything that matched. I pulled out some stuff I had and crocheted myself a bracelet. I only had time to make one then, but I have made more since (and I plan to make even more.)
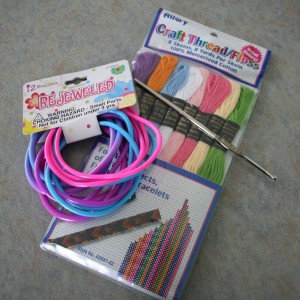
Here’s what you’ll need to make your own pretty crochet bracelets.
Jelly Bracelets
embroidery thread
A crochet hook
White Glue (if you want to starch them)
I got my bracelets and thread at Honks Dollar store on .88 cent Tuesday. This means that each bracelet only costs about .22 cents to make. A cheapskate such as myself get’s pretty excited about that.
All you need to do now is tie a knot with the thread around the bracelet and then single crochet all the way around. I didn’t really count my stitches. I just crochet until the bracelet is completely covered and I can’t see bits of bracelet peeking through. When you get all the way around join the end with a slip stitch into the beginning single crochet.
Next I c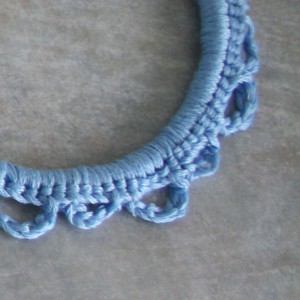 rochet a different border around each bracelet. Some picots, some ruffles, some scallops. I’m still thinking of other borders I can crochet. Most of these only take one little skein of thread, but if you do a stitch that takes more, you might need to use a little of a second skein.
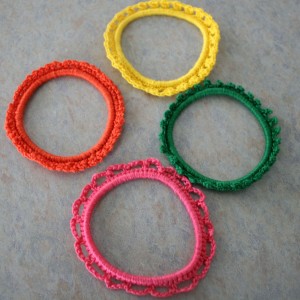
That’s it, just weave in your end and your done. Well, mostly. After a while I found that my borders were curling. It bothered me. I decided to starch my bracelets to make them stand out better.
To starch them I mixed 1 cup of water with 1 tsp of white school glue. I dunked the bracelets then set them out on wax paper, pulling out the little picots and scallops. I don’t know how long they will stay starchy but I do like the results so I will be doing this with all of my bracelets from now on. Do you want to make some bracelets? You should because it’s cheap, easy, and the results are pretty fun.
Before Starching
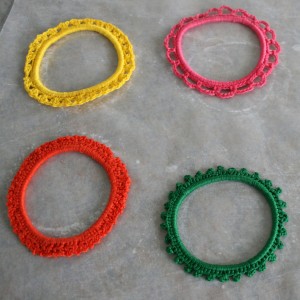
After Starching
Egg Garden
A while ago I got to thinking about how to display dyed Easter eggs. Usually we put them back in their carton in the fridge. Refrigeration is a good idea, but I still wanted something cute. I came up with the idea to make flowers out of toilet paper rolls. I like using household items to make something pretty. 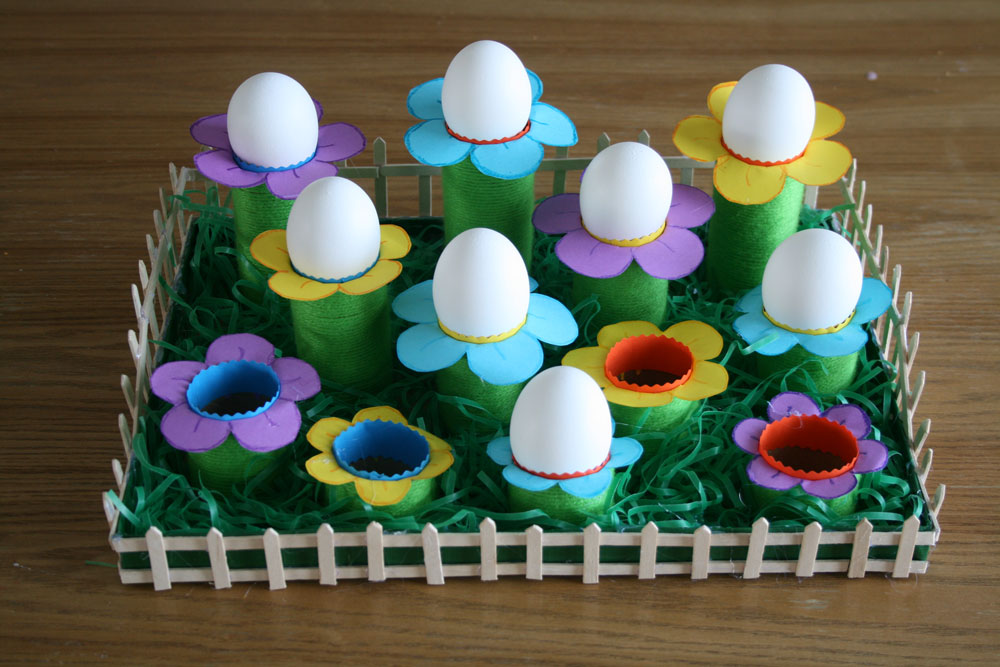
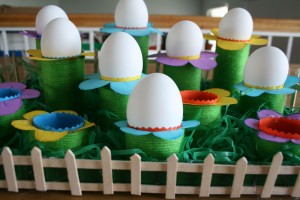
One egg holder is no help at all, so I needed a garden. A garden needs a little fence. I had a box from a bakery (those brown doughnut boxes) and it looked to be just the right size. I cut down the sides and covered them with some green tape. Then I used hot glue and little tiny Popsicle sticks to make a picket fence. I used scissors to cut points on the Popsicle sticks because that’s fency. 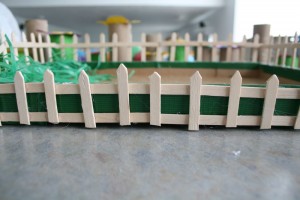
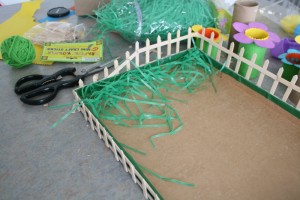
I filled the box with green Easter grass. I hate Easter grass so I glued it down with lots of hot glue so it won’t come loose and I won’t go crazy picking it up all over the house.
As for the flowers, I drew a flower freehand. Then I sat at the computer for an hour perfecting a completely not-freehand flower because I can’t stand petals that are different sizes. I made 3 different sizes of flowers just for variety. I cut slits in the middle so I could glue the flower to the cardboard tube I put a little strip of a different color around the inside.
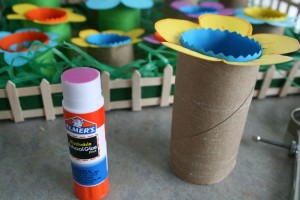
Finally I wrapped green yarn around and around the tube/stem of each flower. I hot glued the flowers into the flower garden box with short flowers in front and taller ones in the back. Voila, flower garden to hold eggs:
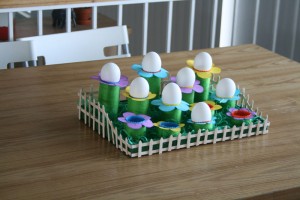
I wanted to make something completely disposable because I don’t have anywhere to keep all the stuff I make. That’s why it’s made mostly out of paper and cardboard. This little garden was a lot of work though, so I don’t see myself throwing it away any time soon.
P.s. One day, after I had been working on this project for a while, I saw that FamilyFun’s website made flower Easter egg holders from toilet paper rolls too. I thought I had a pretty original idea here, but I was wrong. All well, I still like mine.
Colored Rice Picture
This weekend found me and my boys coloring rice. Don’t ask me why, it would take too long to explain. I will tell you this though, it was lots of fun.
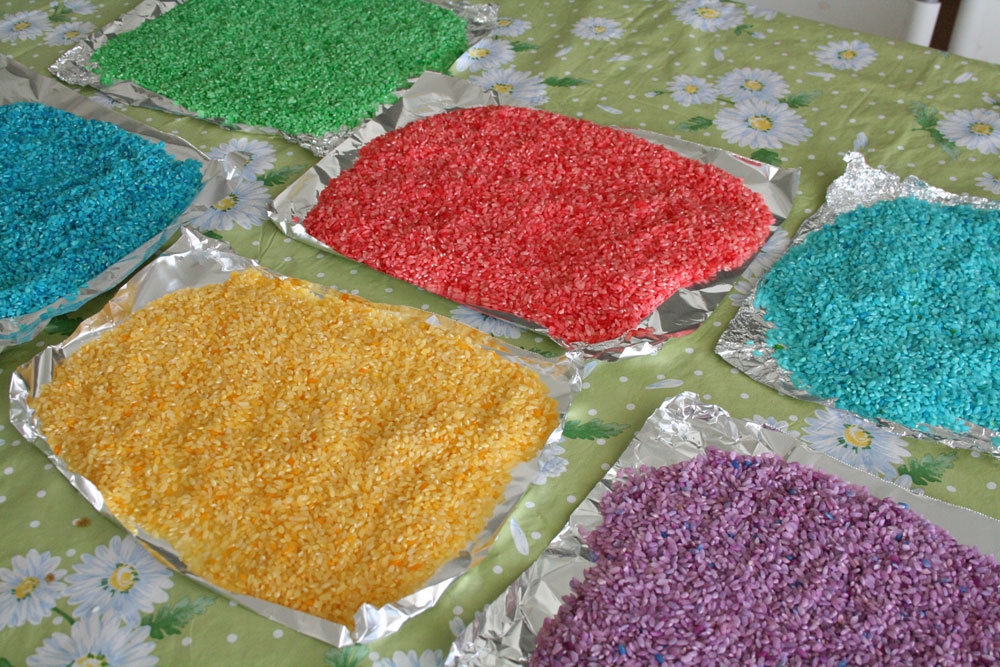 I found my instructions on squidoo. It’s surprisingly easy, essentially you put a couple of cups of rice in a plastic zippy bag. Then you add a few drops of food coloring and a couple of Tbs of water, zip it up and squish to your hearts content. Last you just spread the rice out to dry. A different blog suggested drying out the rice in the oven at 200 degrees for about 15 min. I did use the oven to dry our rice mostly then laid it out to dry the rest of the way. I didn’t take photos of the process, but here’s the rice all laid out to dry.
Pretty, right? I love the vivid colors.
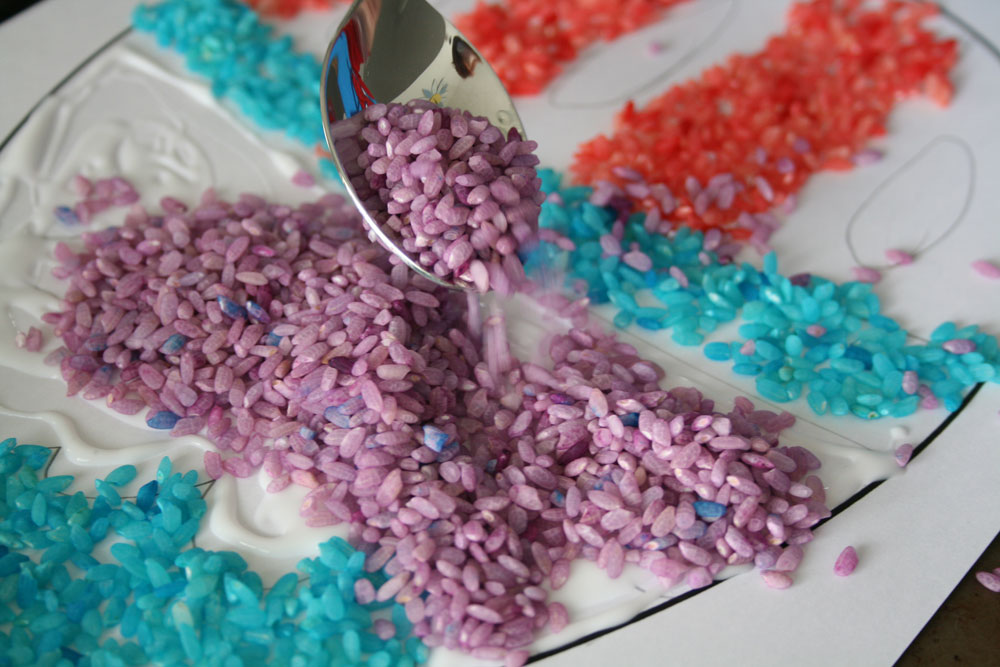
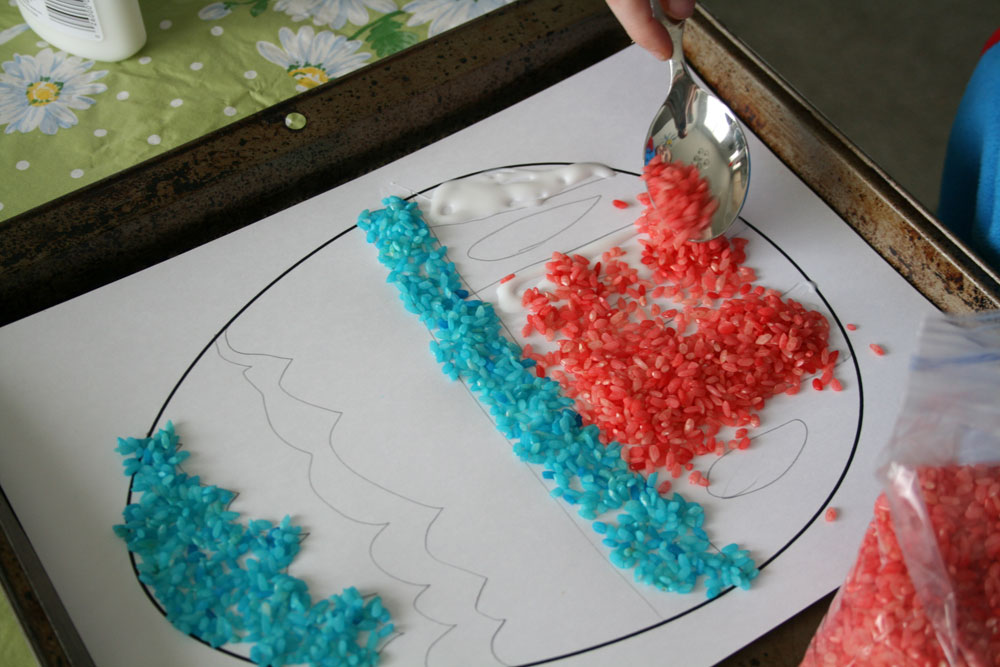
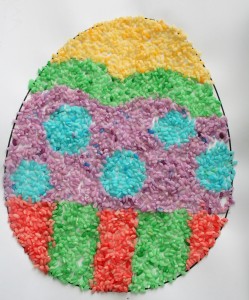
So what do you do with colored rice? Well we made rice pictures (like sand pictures but with rice).
To make our pictures I printed an egg shape (I can’t draw so don’t ask me to). The kids drew lines to show where to put the colors decorate the egg. They used white school glue to fill in the places they wanted color then shook some rice onto the glue. We let one color dry before moving on to the next color. That way the colors stayed where they belonged.
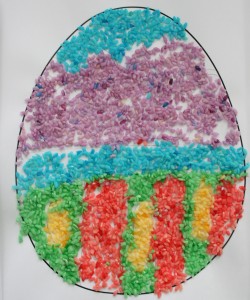
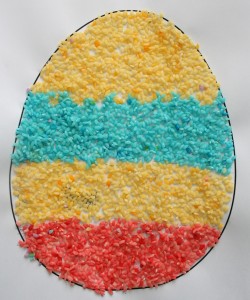
 This was loads of fun and we love the results too. The only problem is that the rice keeps falling off, and the paper warped. How could I fix these problems? Could I spray them with something to make the rice stay put? could I have pressed them with something while drying to make them stay flat? I just don’t know. Any suggestions?
Stay tuned for another colored rice project. It’ll be fun.
Conference Knitting
This weekend is LDS General Conference. That means 3 of my favorite things happen all at the same time. I get to (1) be spiritually uplifted while (2) wearing my jammies all day and (3) I get to knit without feeling like I should be doing something else. You see, knitting is my passion. I love the rhythm of it, I love that you can create so many different things with just one big long string, and I love the satisfaction of a finished project. It being a hobby though, I don’t feel good about sitting around all day knitting. I usually wait until the kids are in bed before I pick up my needles. General Conference weekend is the exception though. I can feel good about listening and knitting all day long. 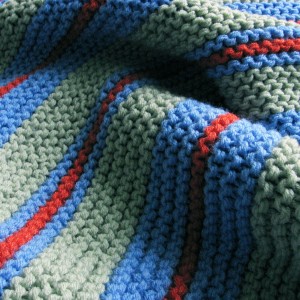
I want to share with you my favorite knitting and crocheting tool. ravelry.com, sometimes I don’t know how the world functioned without ravelry. I will try to explain. Ravelry is an online community kind of like Facebook but not at all like Facebook. You can post photos of the knitted or crochet projects you’ve worked on. You can join groups (for instance I belong to a gluten free knitters group. What does gluten intolerance have to do with knitting? You’ll have to join to find out.) You can browse what other people have made to get ideas. You can look through hundreds of thousands of patterns using really great filters to narrow things down. You can save the projects or patterns you like to look at later. If you have ever knit or crochet anything you should check it out. If you do, click on the people tab and look me up . I’m Joooniper, friend me, I’d love to see what projects you are working on.
The Perfect Frosting
I am on a quest for perfect frosting. I went to a cake decorating class at the church last month and it was so fun. What really got me though was the taste of the frosting. It was sooo good. This inspired my quest. You see I am supposed to be gluten free but that is so hard when faced with a beautiful cake from Costco or some other grocery store. I just love cake with bakery frosting. Now that Betty Crocker has gluten free cake mixes I’m one step closer eating cake with out killing myself but it’s the frosting that I can’t get right. And so begins the quest.
After trying a bunch of recipes I think I have found a winner. Check out my pretty cake:
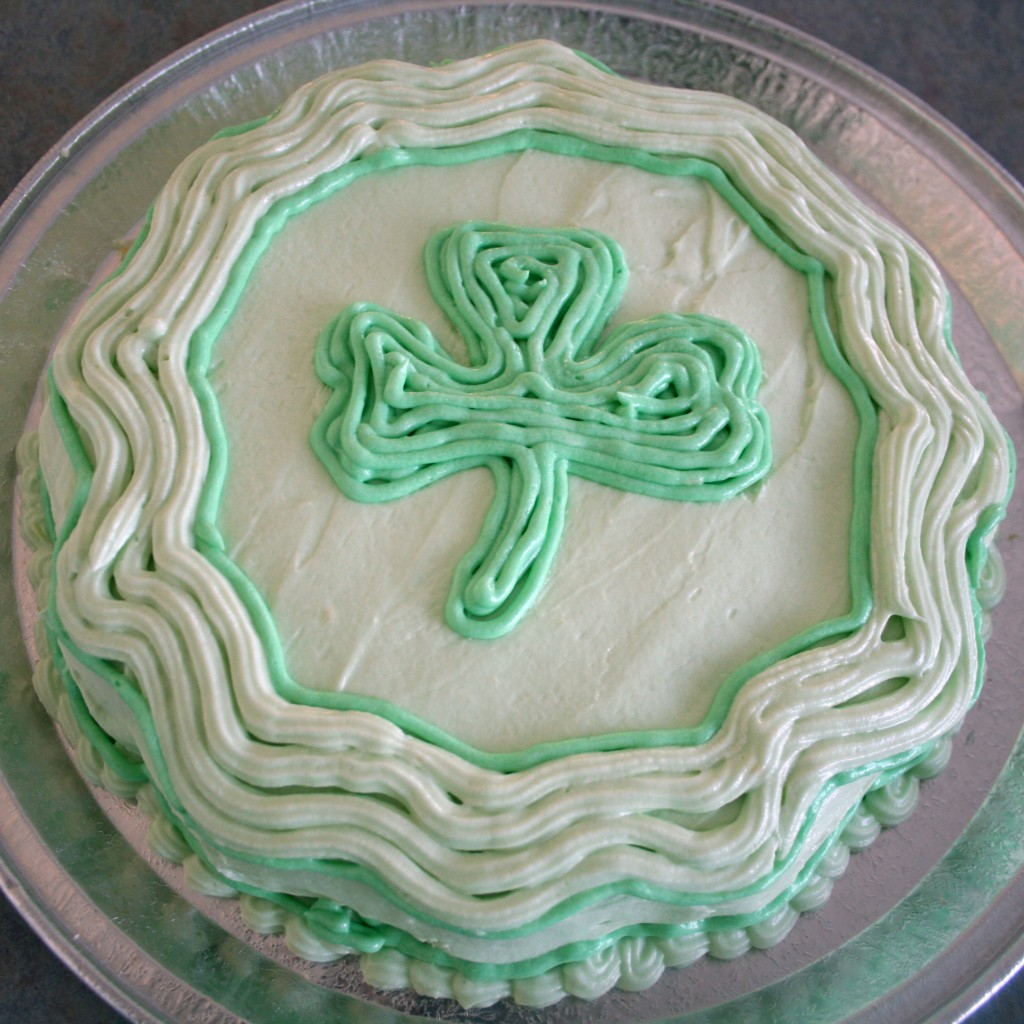
Obviously I’m no decorator but the frosting tasted divine. I used a recipe I found online I added a teaspoon of meringue powder and a teaspoon of salt. I think I used too much water because the frosting didn’t hold it’s shape. The shape wasn’t all that pretty anyway, I have much to learn. My quest didn’t include learning to decorate though. It was a tasty frosting quest and I think I’m near the end. I have eaten a lot of cake to get there. Do you want a piece? I’m looking for excuses to make more cake so I can try variations on my new frosting find.